How to Optimize Images Quickly
Image Optimization refers to methods and techniques used to improve the quality of images, reduce load times and enhance the user experience. The goal of optimization is to keep images as visually appealing as possible while reducing file size. Image Optimization can do some help on your end.
Operational Guidelines:
Settings: help you quickly understand the configuration you need for image optimization
Go to the Settings Page
Image Optimization Settings
Setting the Image Alt
Setting the Image File Name
Save
Optimization record display: see if your optimization success is as expected
Optimize Settings Panel
Optimize Log
Optimize Detail Display
Recover and re-optimize your images: Hassle-free operation, you can withdraw the inappropriate optimization operation at any time, no need to worry about the optimization will affect your original image
If the optimized image does not achieve the optimization you need, you can recover your images
Re-optimize Manually
1. Go to the Settings Page
When you enter Image Optimization for the first time, you can set your desired image optimization configuration here, and click Save to save your settings.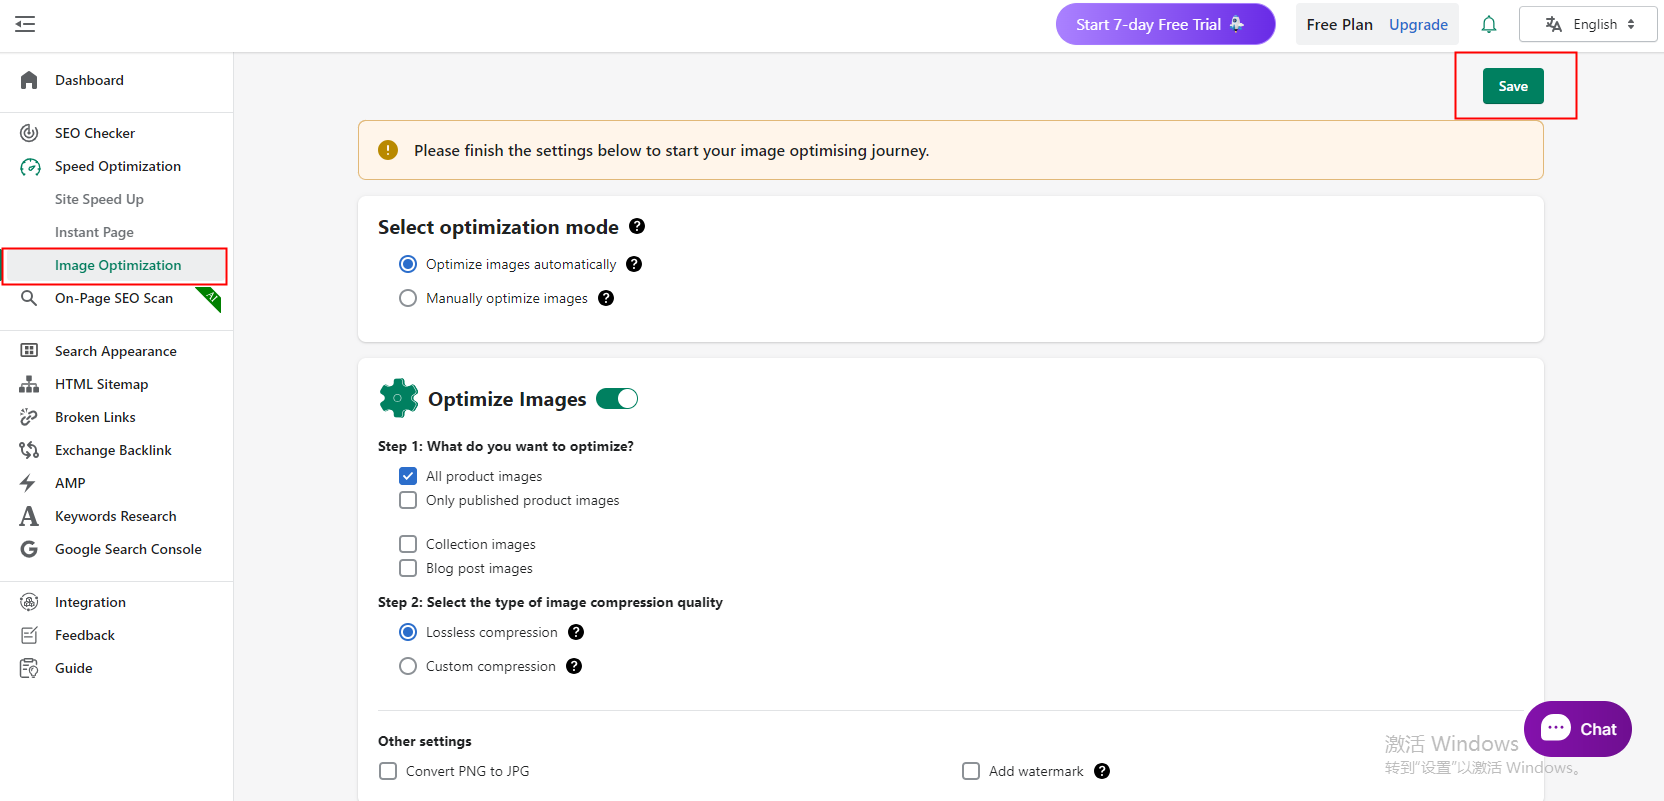
Choose the way you want to optimize images, you can choose automatic mode or manual mode for image optimization.
Automatic Optimization: It can automatically identify and apply the best compression algorithms and optimization techniques to reduce image file size, improve loading speed, and maintain image quality as much as possible. (We recommend you use the Automatic Image Optimization feature)
Manual Optimization: It refers to the optimization of images, web pages, or code, etc. through human intervention and manual adjustments to achieve better performance, user experience, or other goals. When it comes to image optimization, manual optimization provides finer control for specific images and optimization needs.
Note: You need to manually optimize your images before you need to enable automatic optimization to sync your images.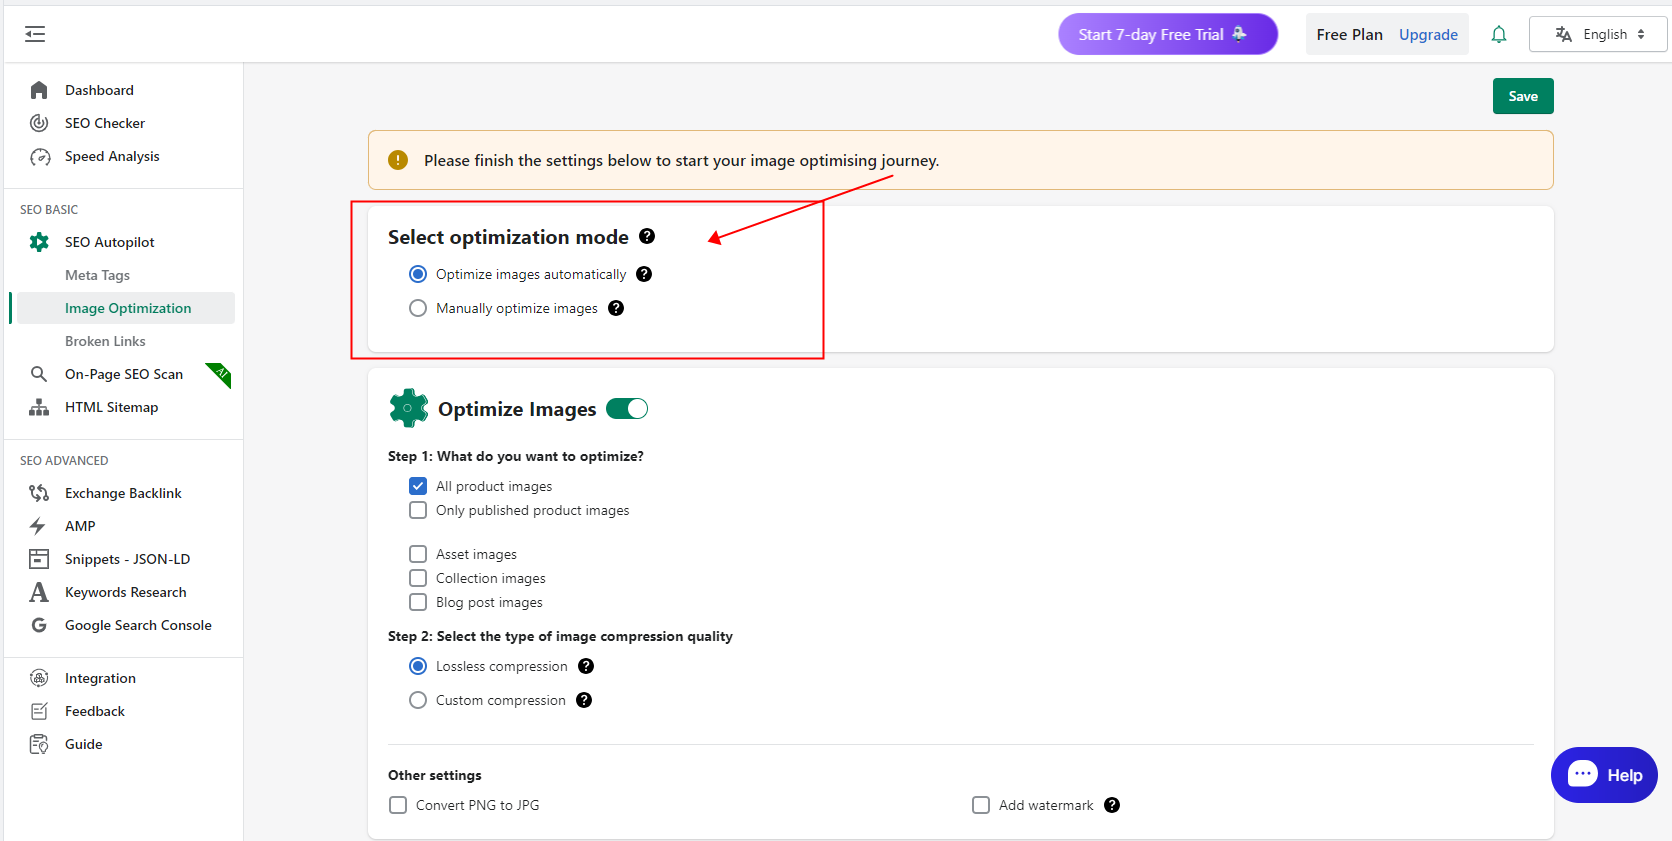
2. Image Optimization Settings
Step 1: You can choose the type of image you need to optimize
product images
Collection images
Blog post images
Please note:
- All product images and Only published product images refer to single-option.
- All product images: We will optimize all your unoptimized product images.
- Only published product images: We will only optimize the images of the products you post.
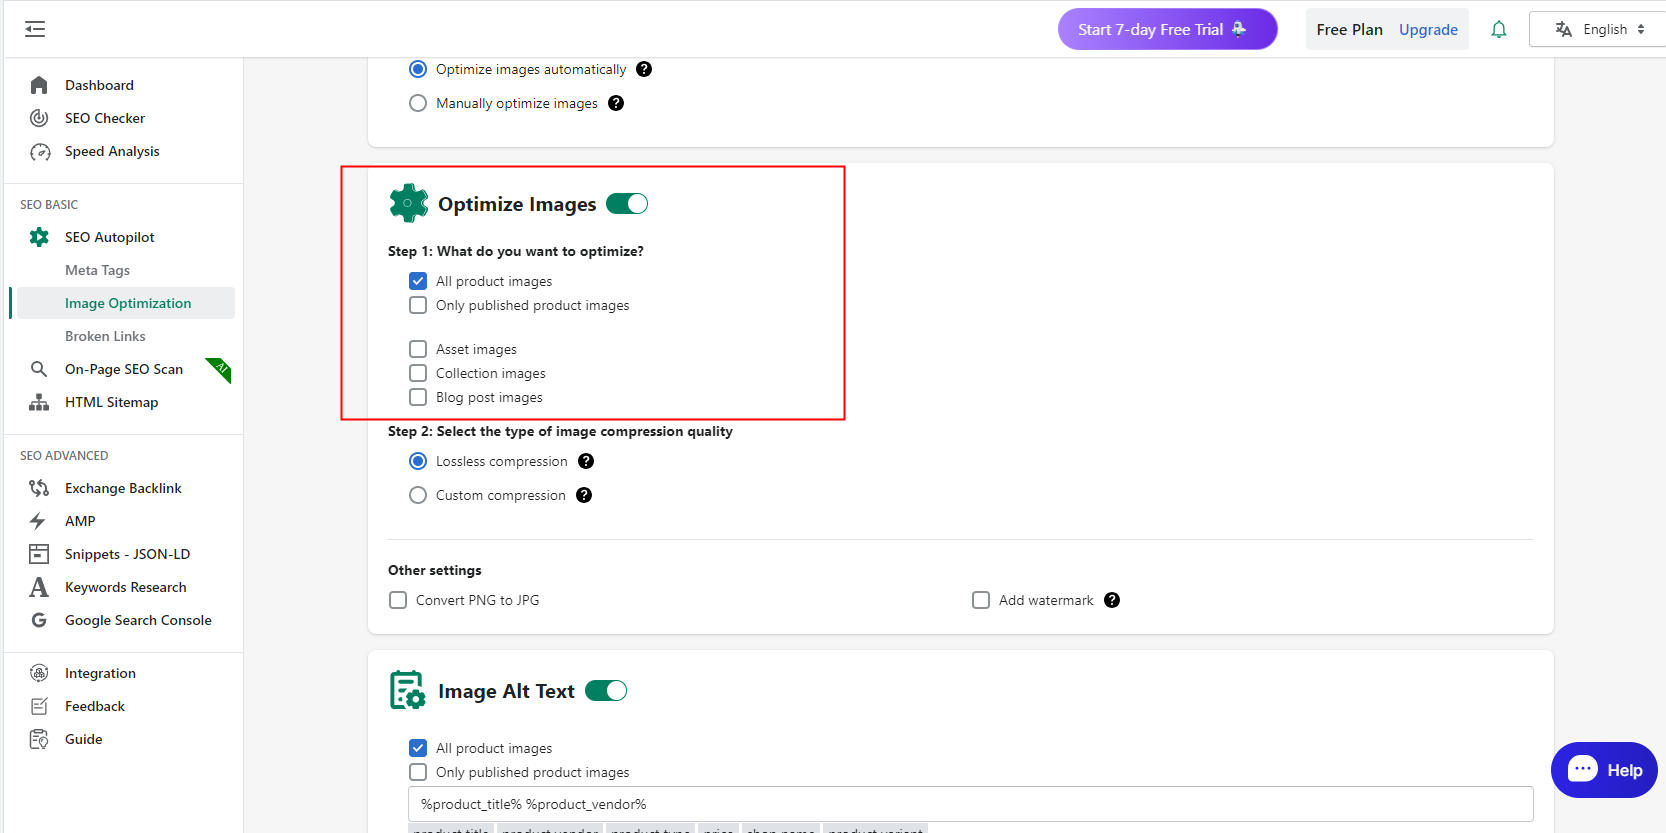
Step 2: You can set your image compression type
Lossless Compression: reduce file size without degrading image quality.
Customized ratio compression: Manually select the ratio for compressing the quality of the image.
Note: If you choose to customize the ratio of the way to compress the picture, the compressed picture will not necessarily be compressed in accordance with the ratio you set, it will be compressed according to the actual size of the picture.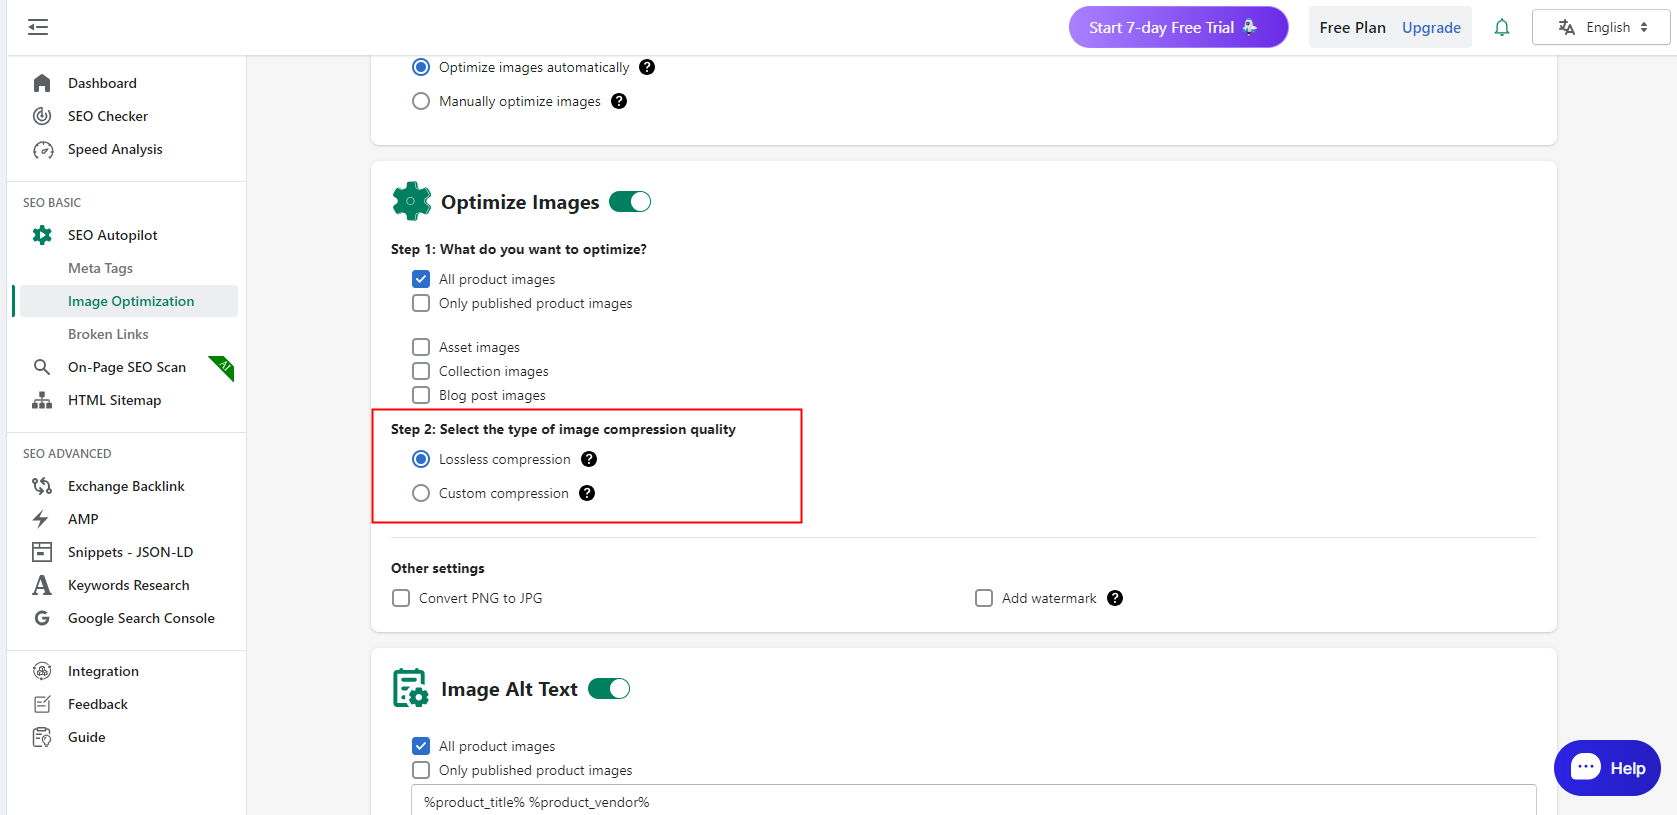
Step 3: You can choose whether or not to convert the optimized PNG image to JPG format
Note: This process may result in a larger image size, then the process will stop.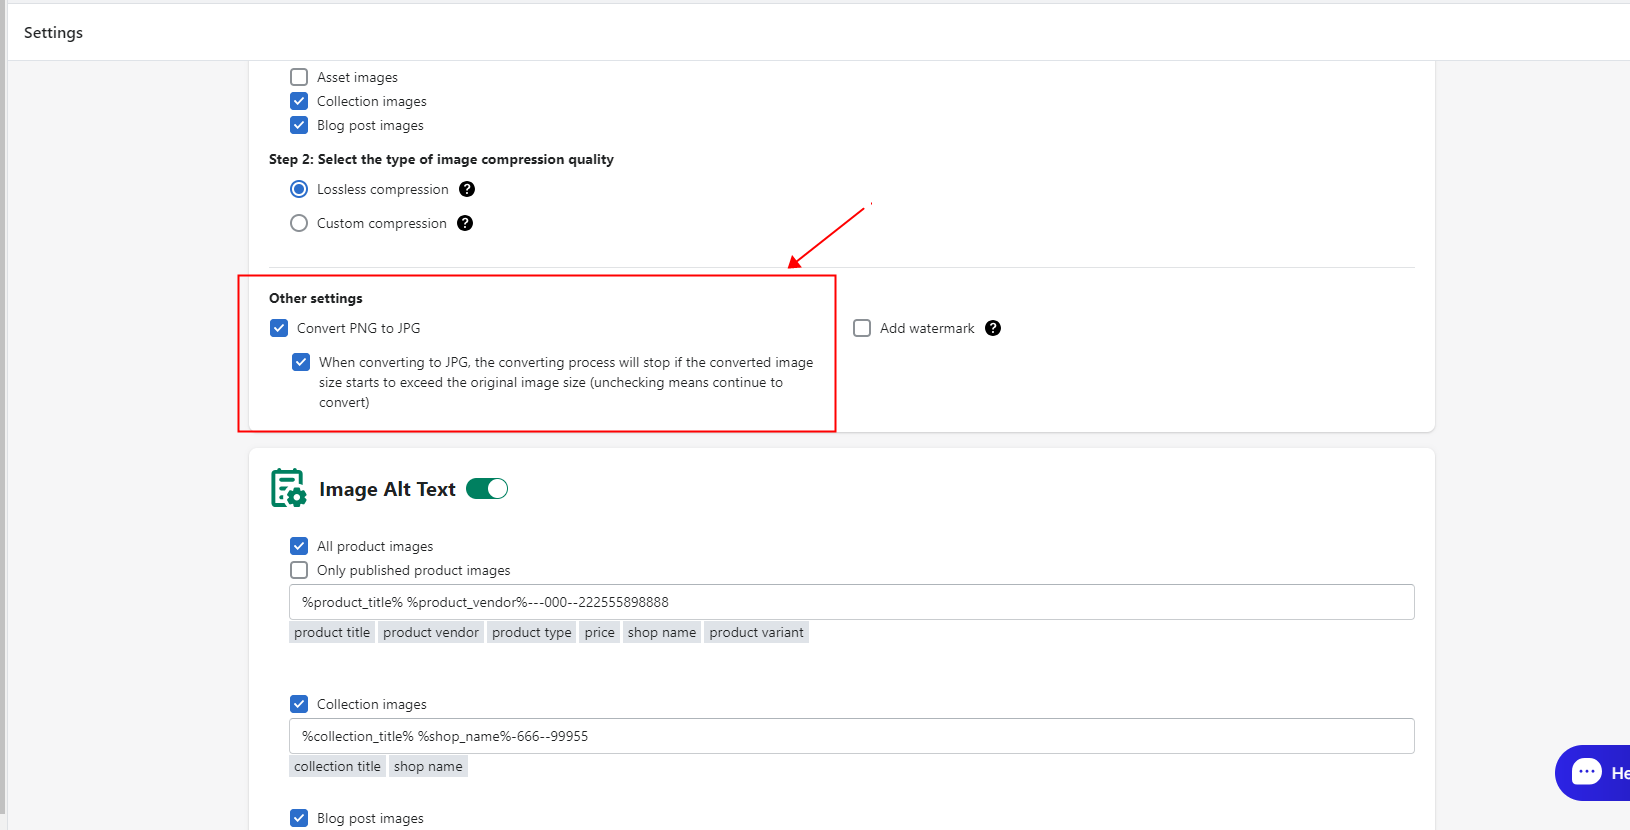
Or you need to add personalized watermark image and modify the watermark settings according to your needs.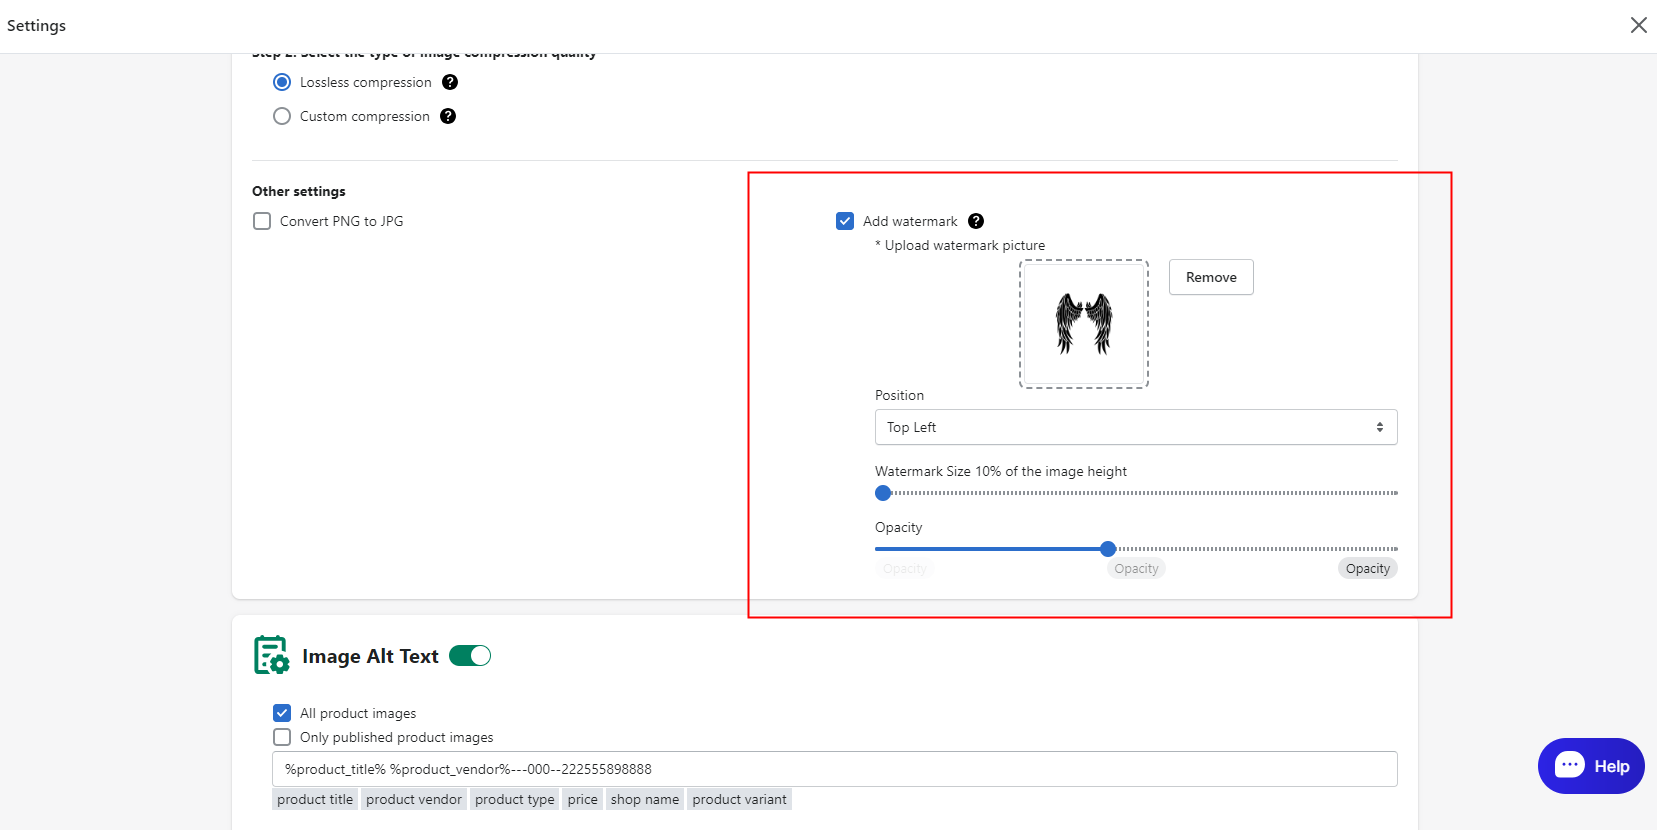
3. Setting the Image Alt
Enable the switch of image alt. The "alt" attribute of an image is set to provide alternative descriptive information about the image, which is important for web accessibility and search engine optimization (SEO). Search engine crawlers cannot understand image content directly, but they can read and understand the text of the "alt" attribute. Therefore, setting proper "alt" attributes for images can help search engines understand the content of the image, thus increasing the exposure and ranking of the image in search results.
please note:
- All product images and Only published product images refer to single-option.
- All product images: We will optimise all your unoptimised product images.
- Only published product images: We will only optimise the images of the products you post.

Batch Rule Setup:
- We give you commonly used bulk rules to help you quickly set the image alt you need, just click on the bulk rule you need to populate the input box.
- You can also custom and enter the alt batch rules you need!
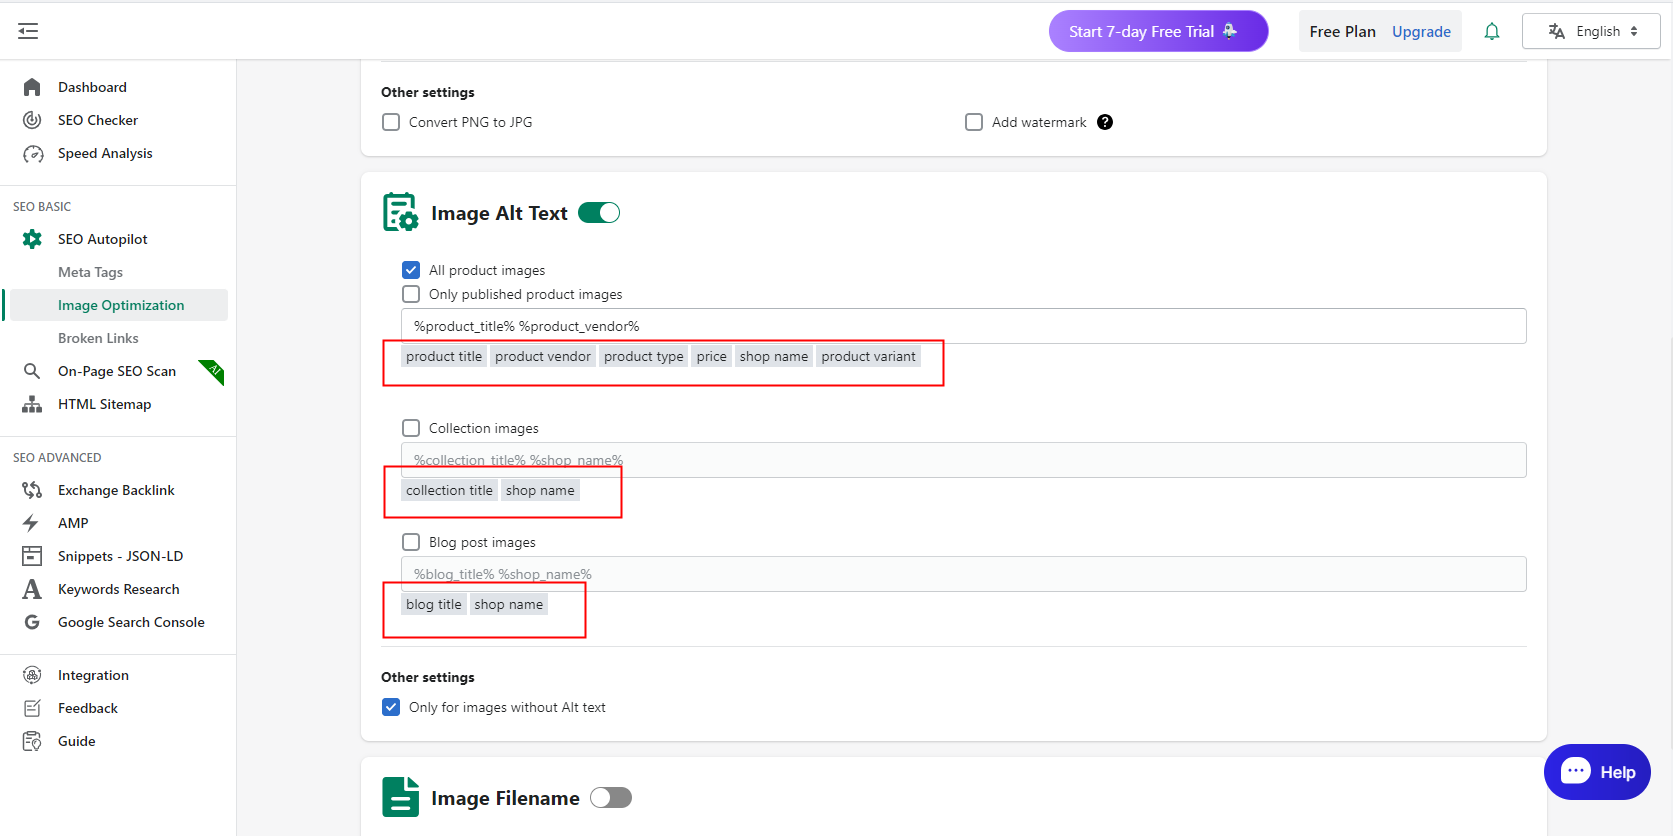
Other settings: when you add a new picture without alt, it will help you automatically generate alt according to the above settings.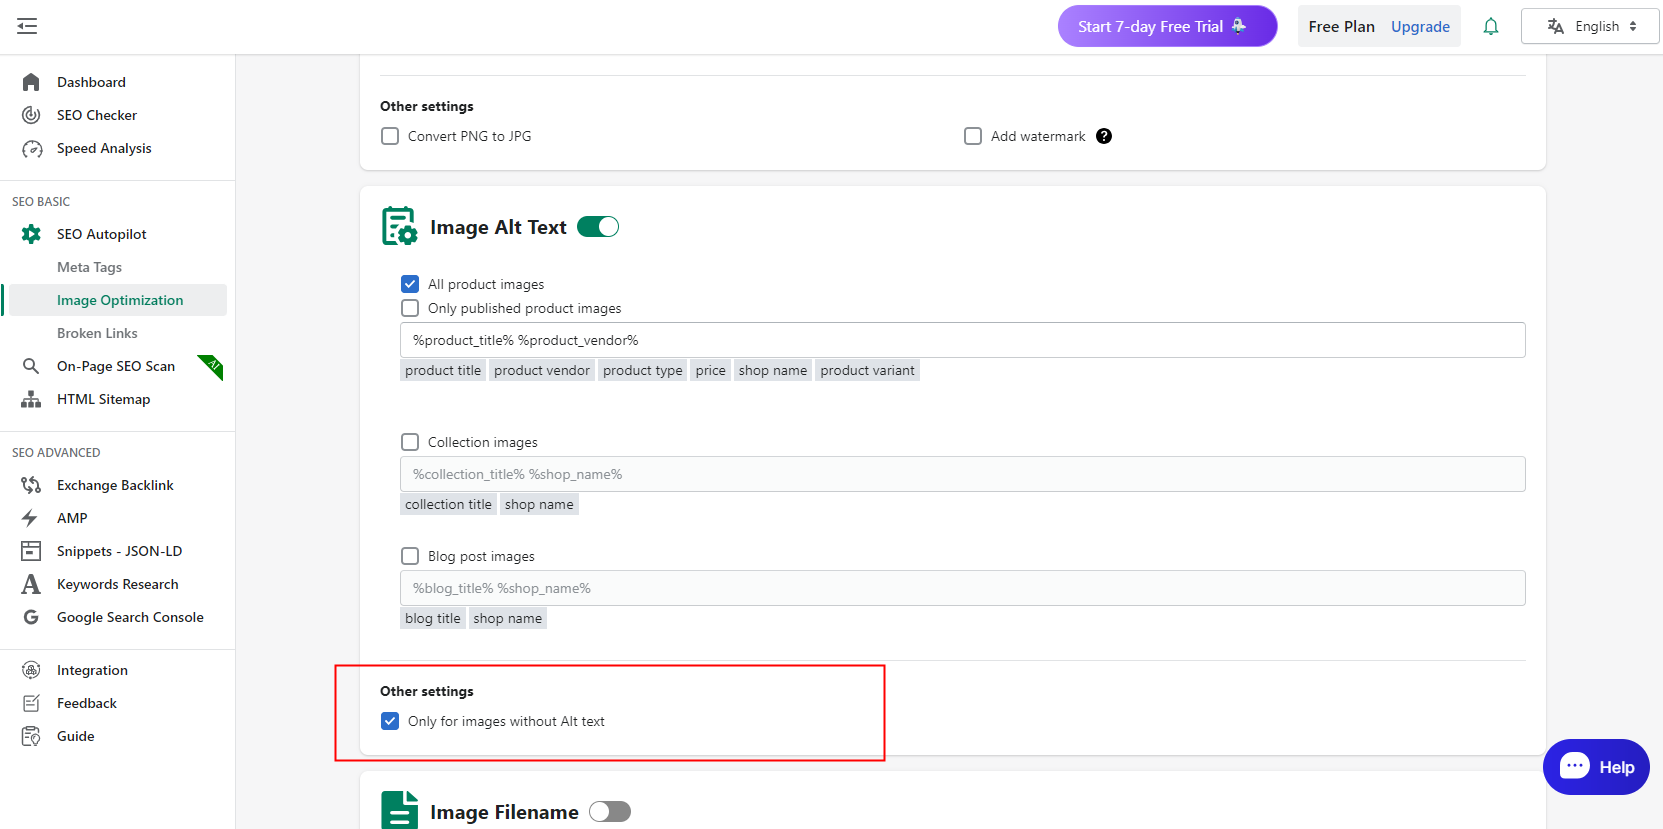
4. Setting the Image File Name
Image file names also have an impact on search engine optimisation (SEO). When search engines crawl a web page, they examine the image file name and correlate the keywords in the file name with the content of the web page. Therefore, naming image files using keywords that are relevant to the content of the image can help improve the exposure and ranking of the image in search results.
We also provide you with common batch rules to help you quickly set up the filenames you need, or you can customise the filenames you want!
please note:
- All product images and Only published product images refer to single-option.
- All product images: We will optimise all your unoptimised product images.
- Only published product images: We will only optimise the images of the products you post.

5. Save
Click save, and it will start optimising the image for you according to the rules you have set.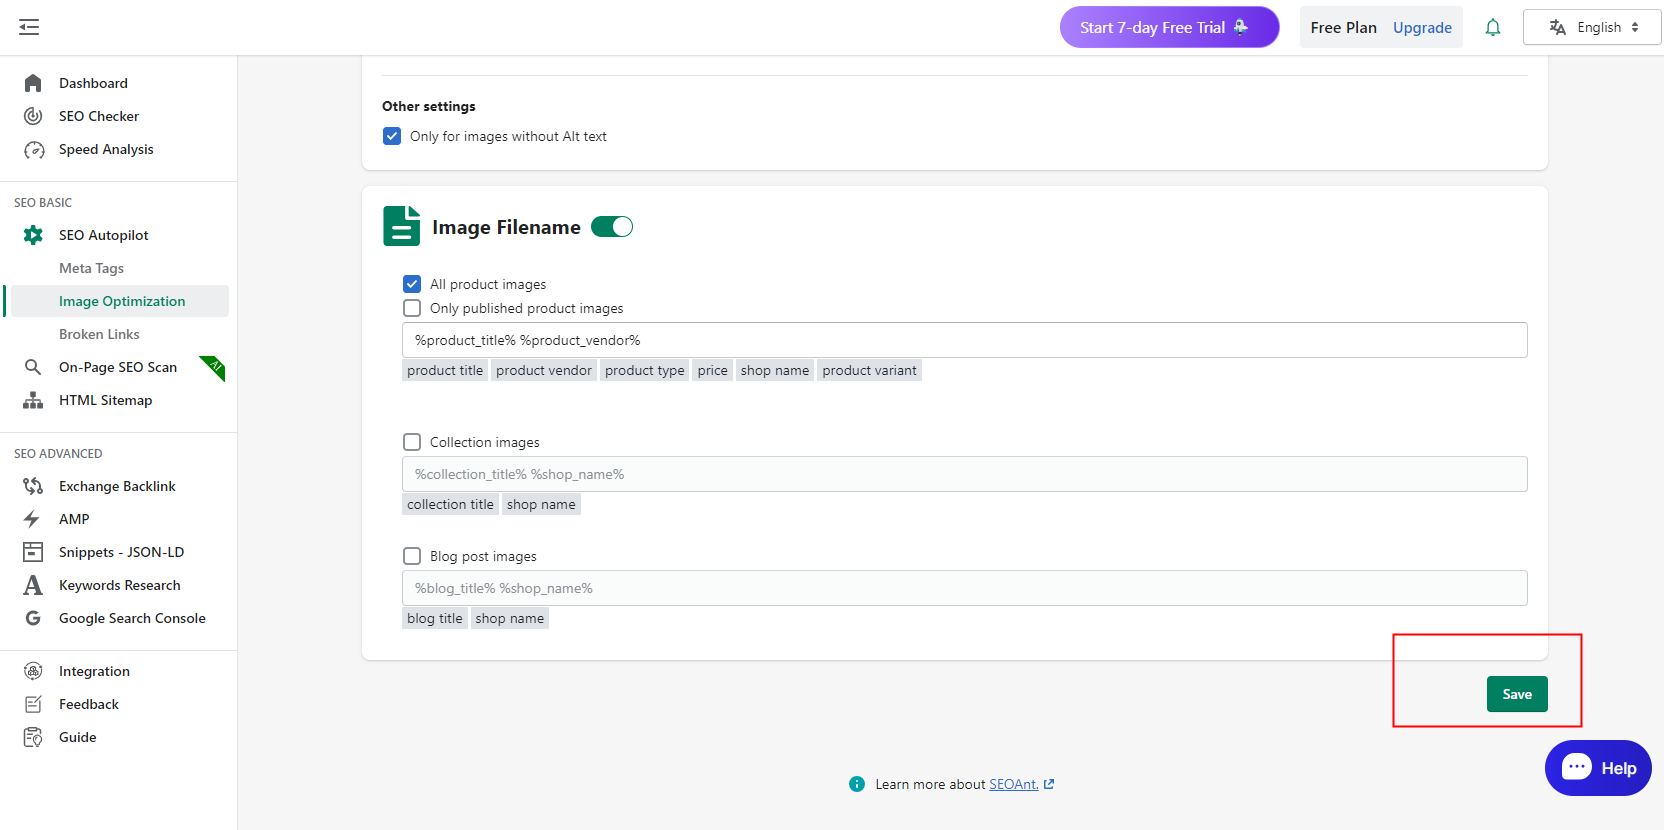
6. Optimize Settings Panel
Shows your settings and can also modify your settings.
7. Optimize Log
Daily optimisation records will be recorded here, they will be divided into manual optimisation records and automatic optimisation records display. If you want to see the details of the image optimisation, you can click the Details button in the records.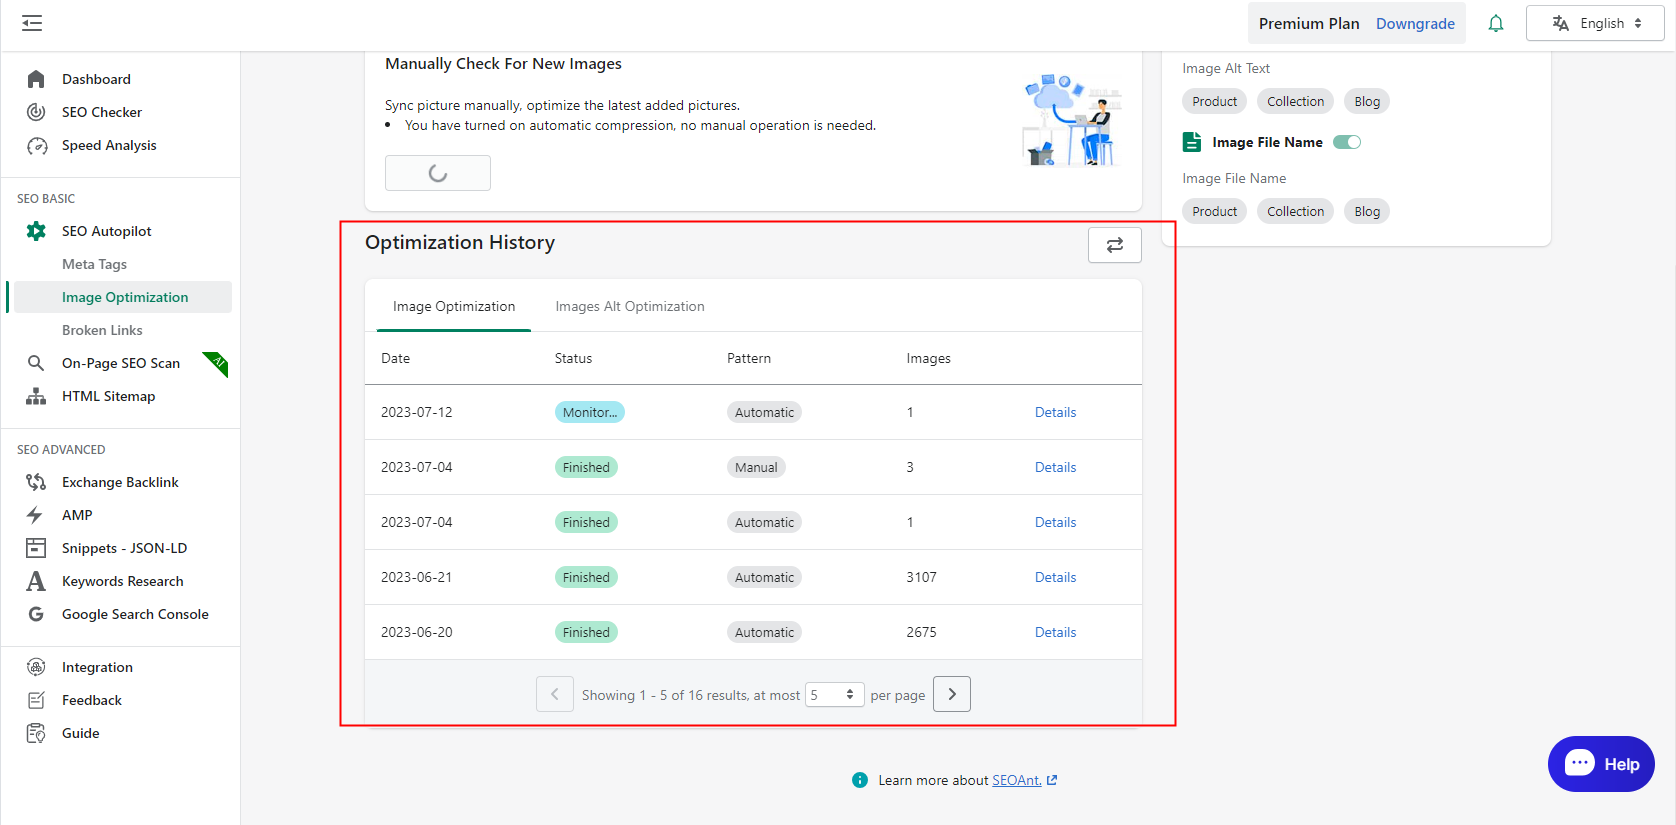
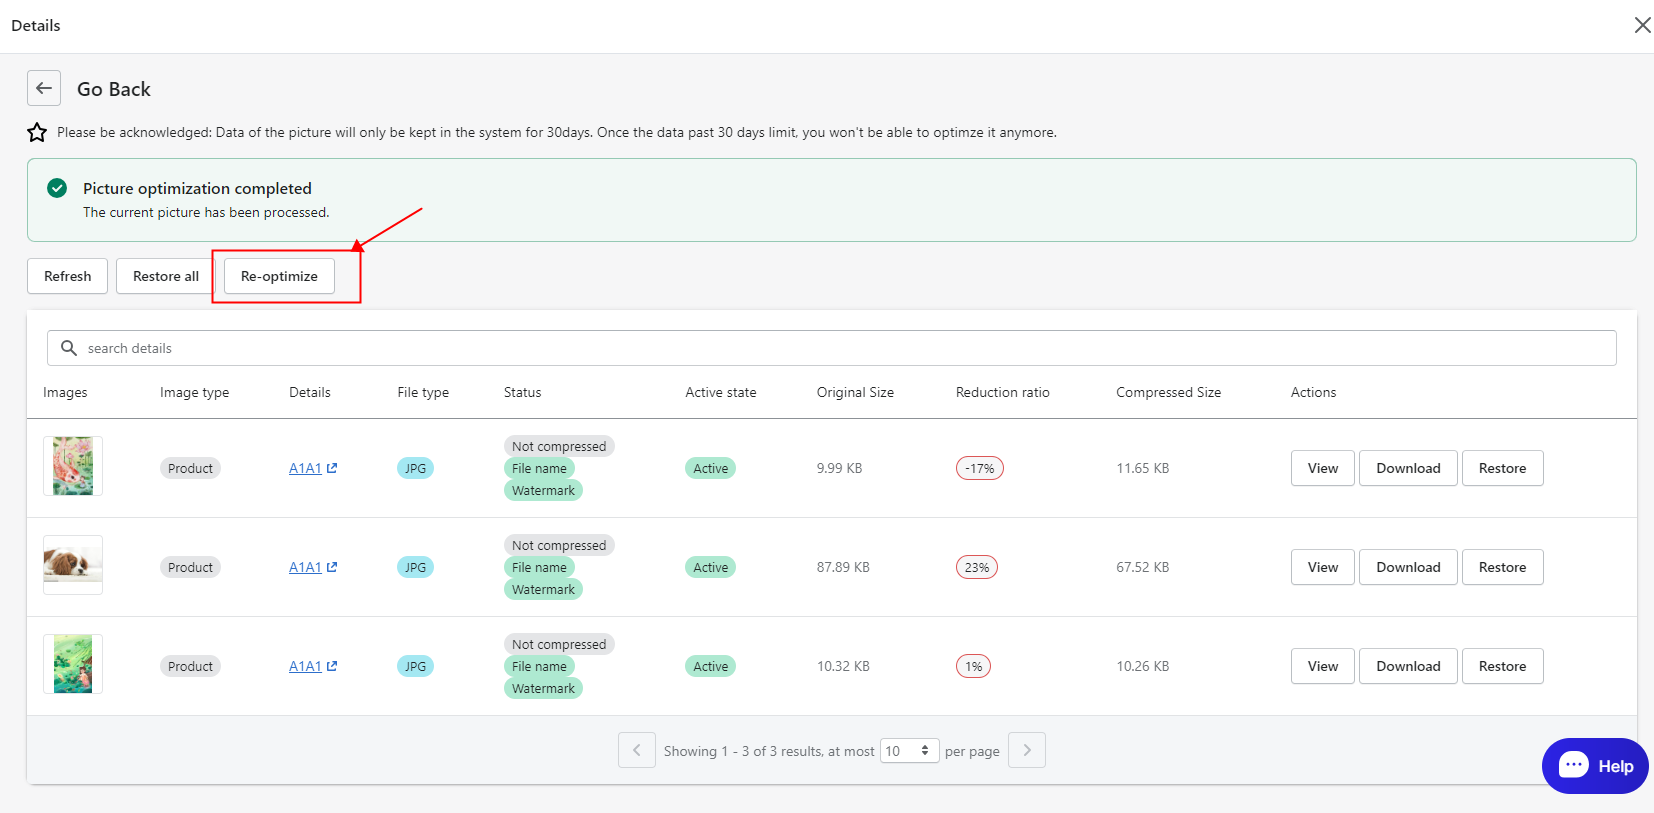
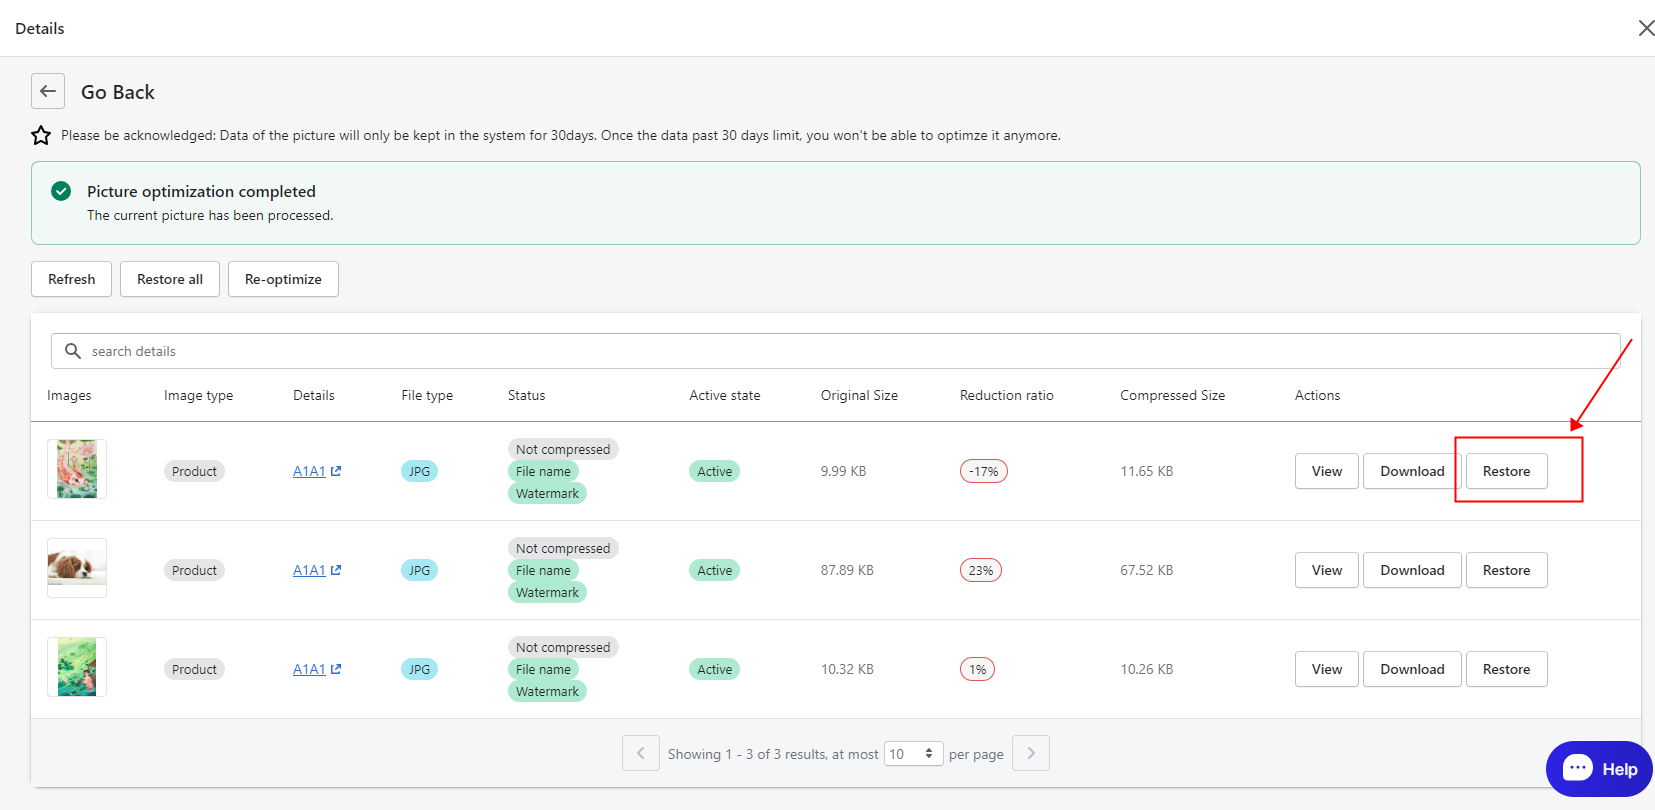
8. Optimize Detail Display
- Optimise detail display

- It Will show here what optimisations have been made to this image.
A green status means that the optimisation was successful, a grey status means that it was not completed for some reason.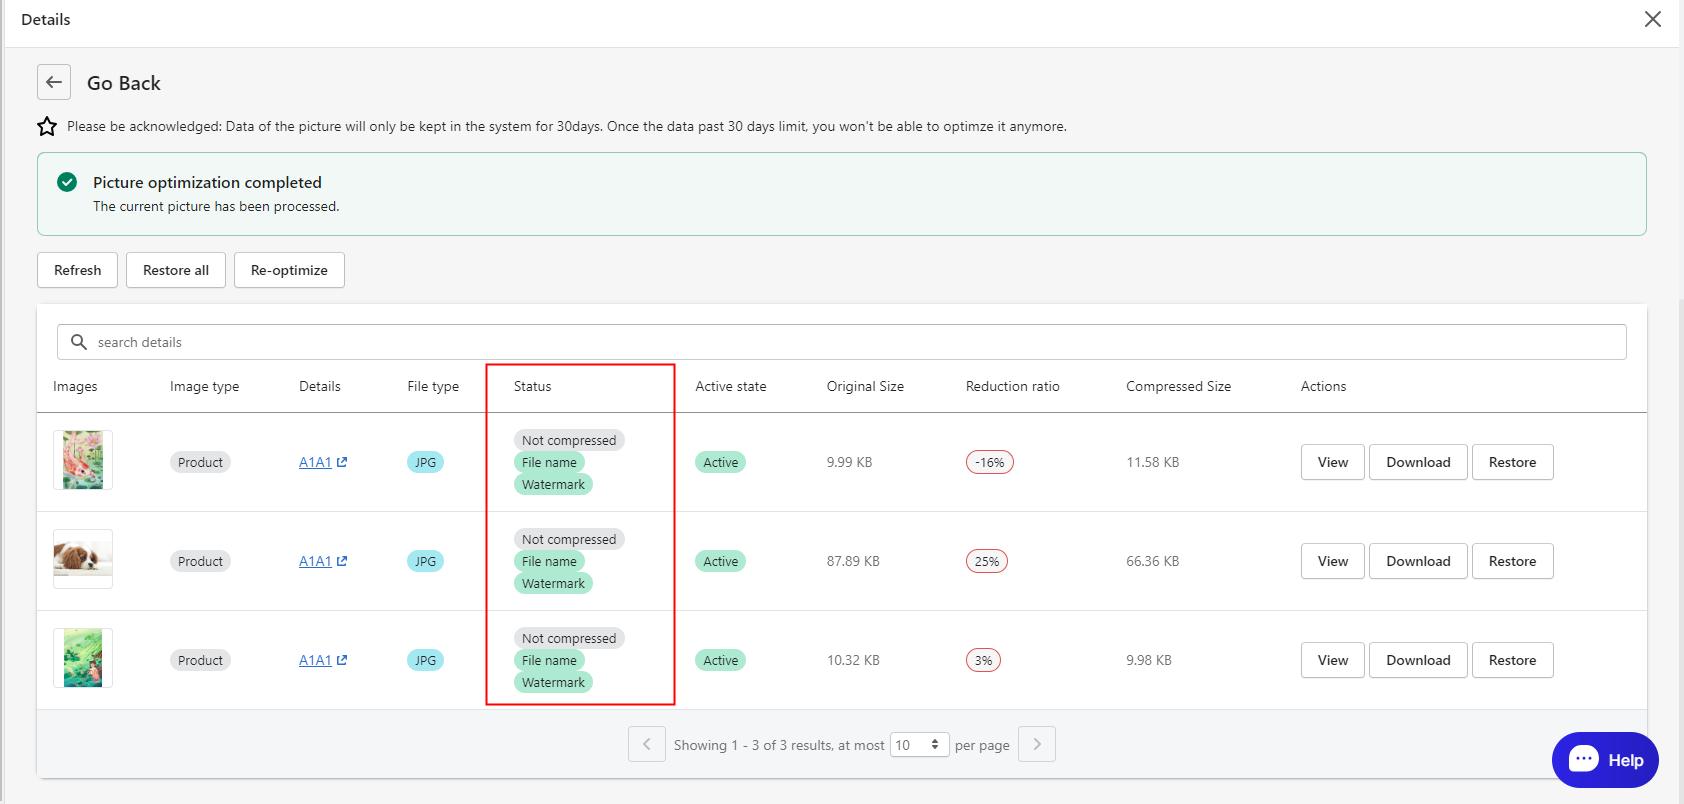
- Demonstrate the comparison of optimisation images before and after
Click on the image or view button to show the optimisation before and after.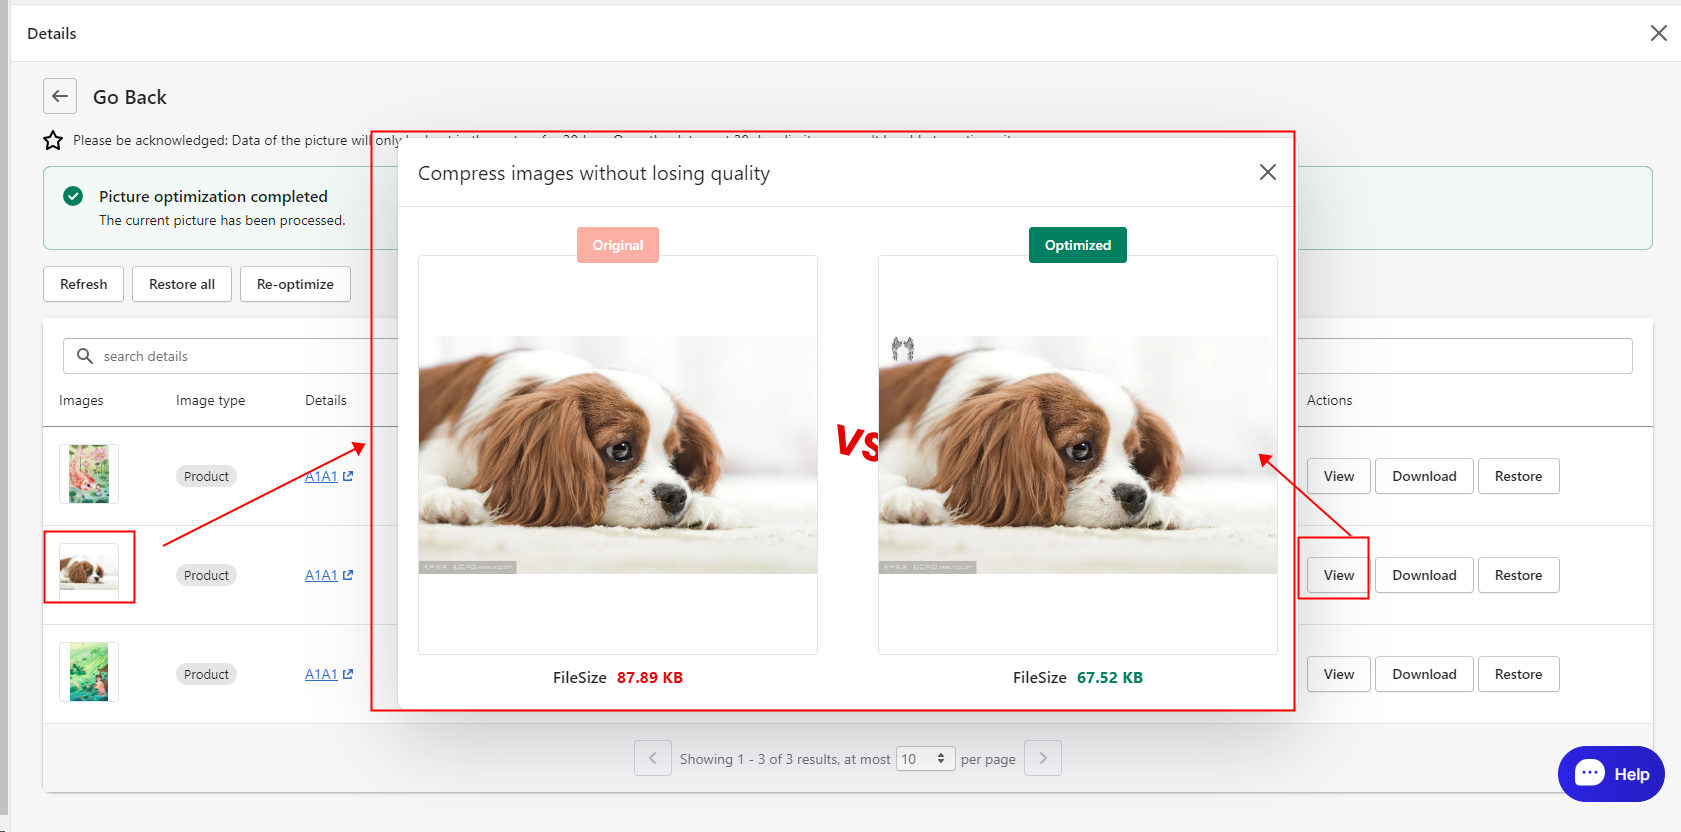
9. If the optimized image does not achieve the optimization you need, you can recover your images
Note: Set up to manual optimisation first.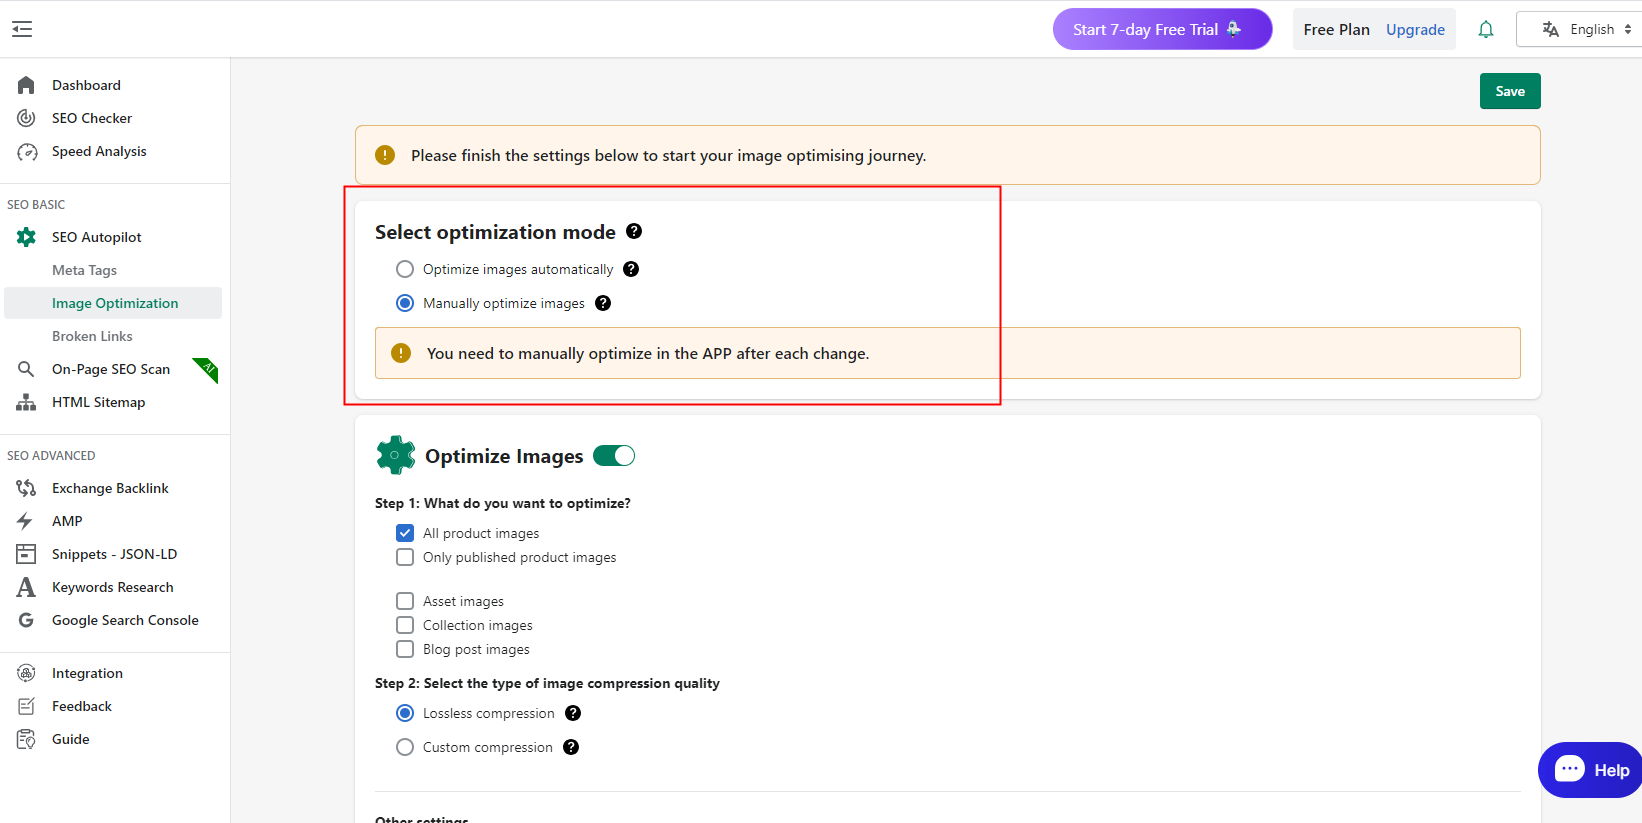
- The way of recovering one picture is to click Restore button behind related picture.
- The way of recovering one picture is to click Restore button behind related picture.
Click Restore all button to restore all optimised image records.
10. Re-optimize Manually
Click Re-optimize button and it will re-optimise the images under related record manually.