How to accomplish AMP Setup in SEOAnt
Accelerated Mobile Pages (AMP, meaning "Accelerated Mobile Pages") is an open-source project led by Google to improve the speed of accessing websites from mobile devices. According to the data released by Google, most users will abandon and close the web page if the access speed is too slow. Web pages using AMP can be read and displayed quickly, and visitors can see the content of the page without waiting after clicking the link.
AMP Settings for Pages
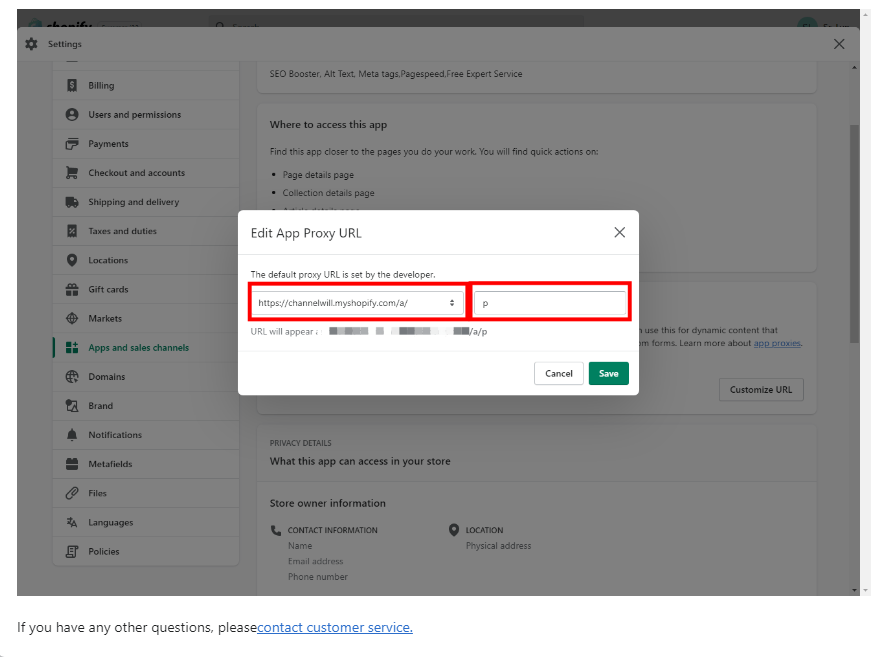
Navigate to AMP, we will firstly encounter a pop up window "App proxy modification process". Please follow the steps to modify the proxy, and make sure to complete this step.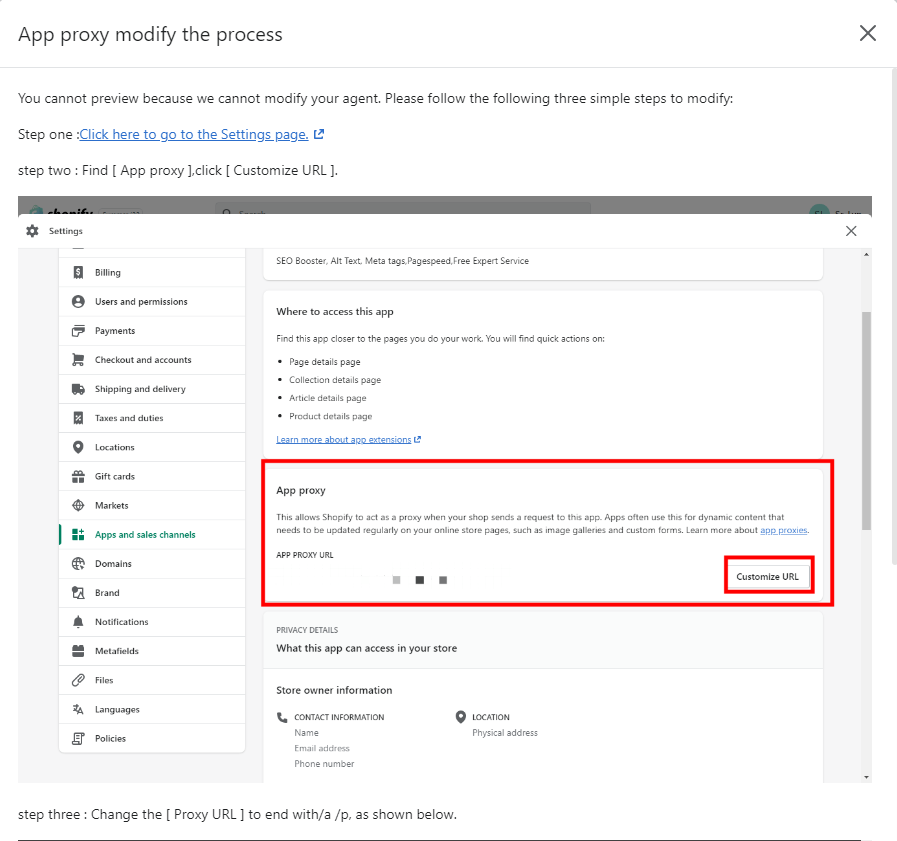
Next, if you haven't turned on the app's embed block, a new pop-up will continue to prompt that you need to enable the app embed block. Some of our app's features require the app embed block to be enabled to work properly, and one of the AMP features requires the app embed block to be enabled, so please be sure to enable the app embed block.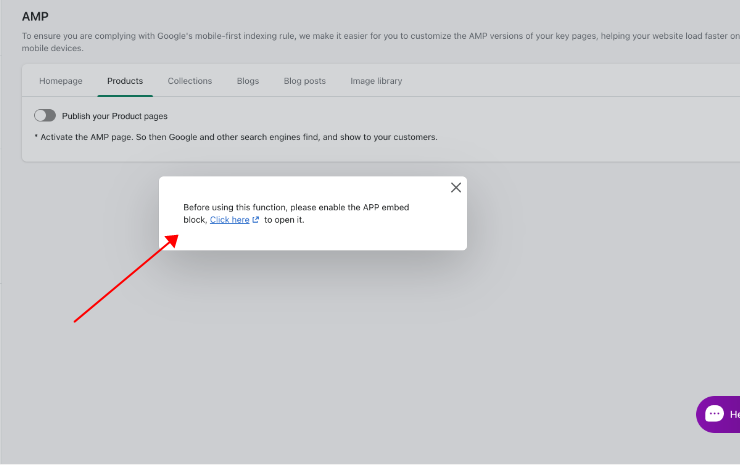
This is an example of successfully turning on the app embed block. Remember to click Save.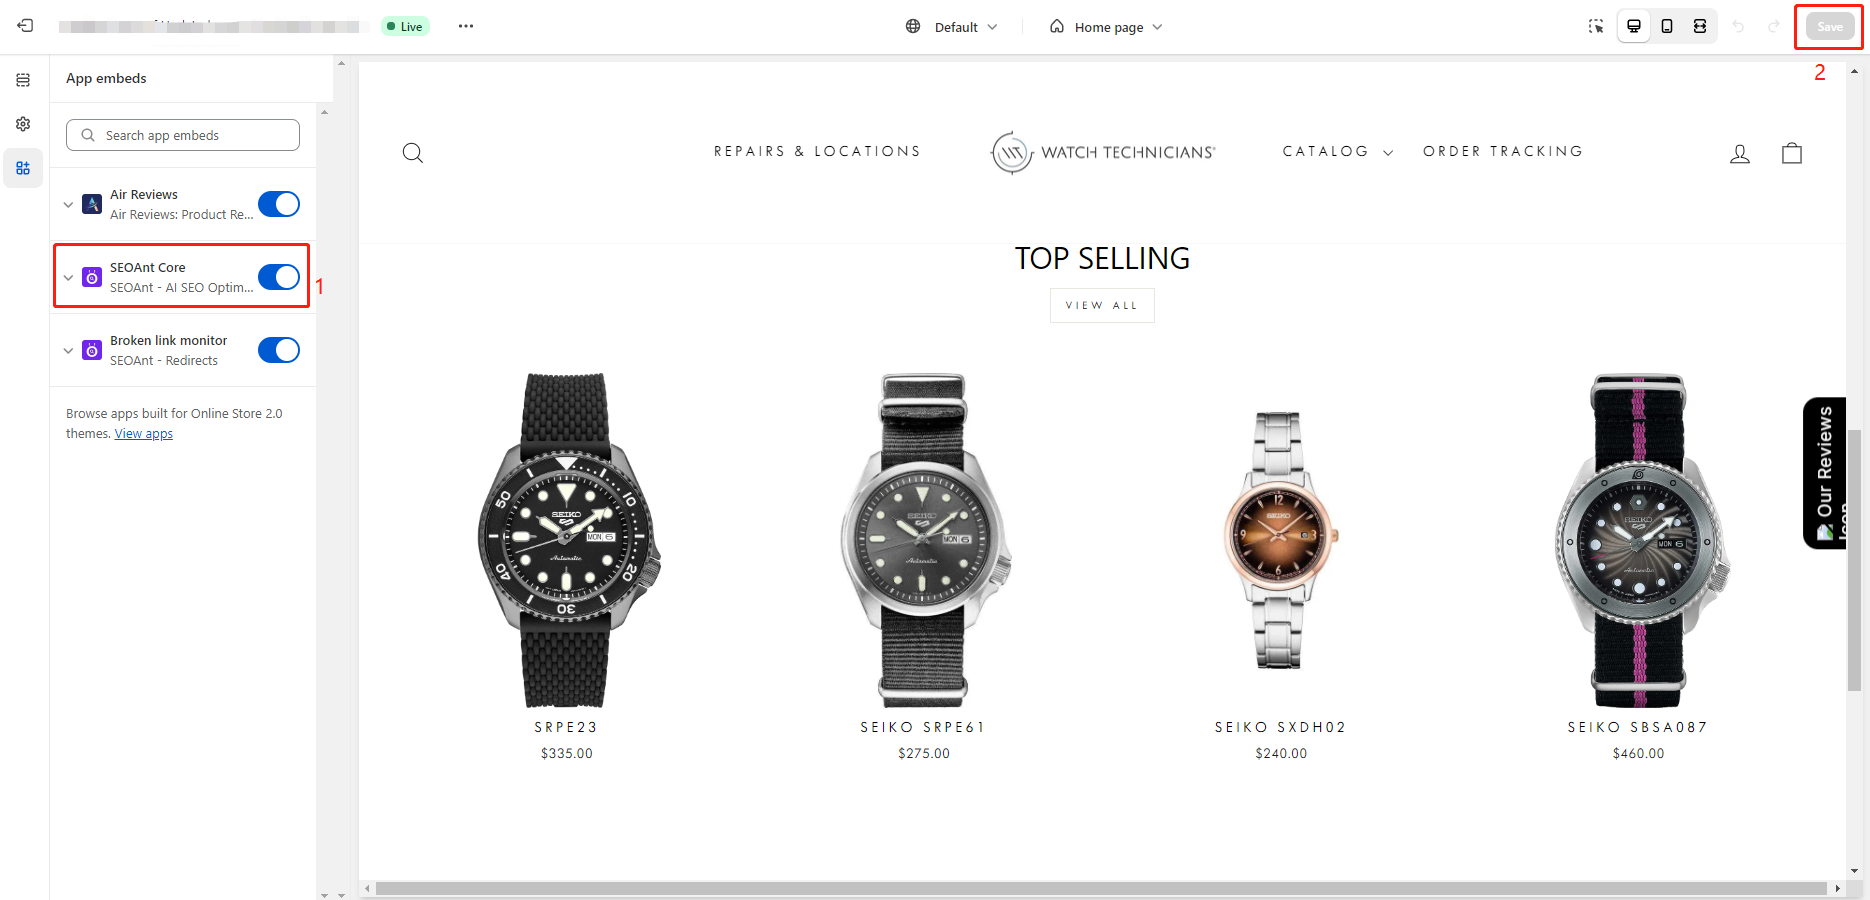
Then, we proceeded to click on the on/off button for all types of pages within AMP so that all AMP pages can be accessed properly.
Turn on the Homepage AMP switch.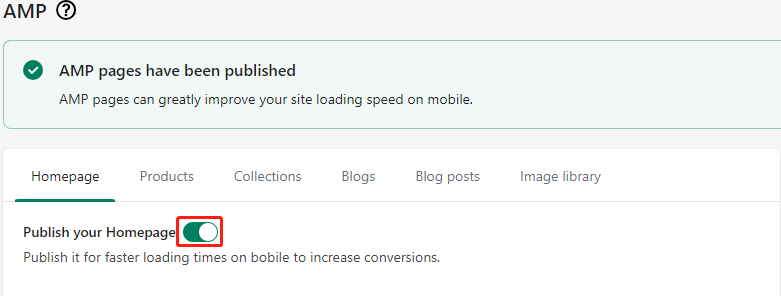
Turn on the Product page AMP switch.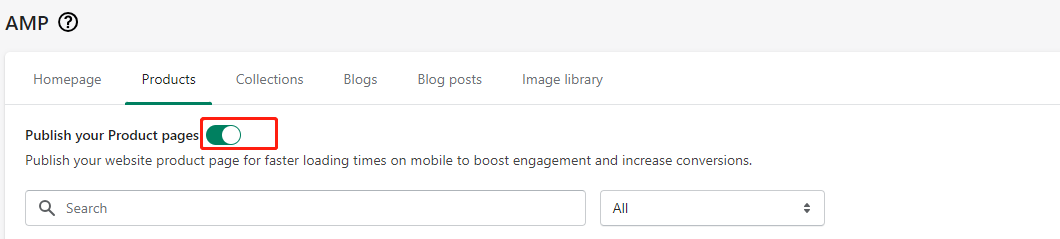
Turns on the Collection page switch.
Enable the Blog page switch.
Turn on the Blog posts page switch.
This is an example of the Homepage AMP page after successfully setting up Homepage Sections.
The amp page will have an extra "/a/p" field in the url name, which we can use to distinguish whether the page is an AMP page or not.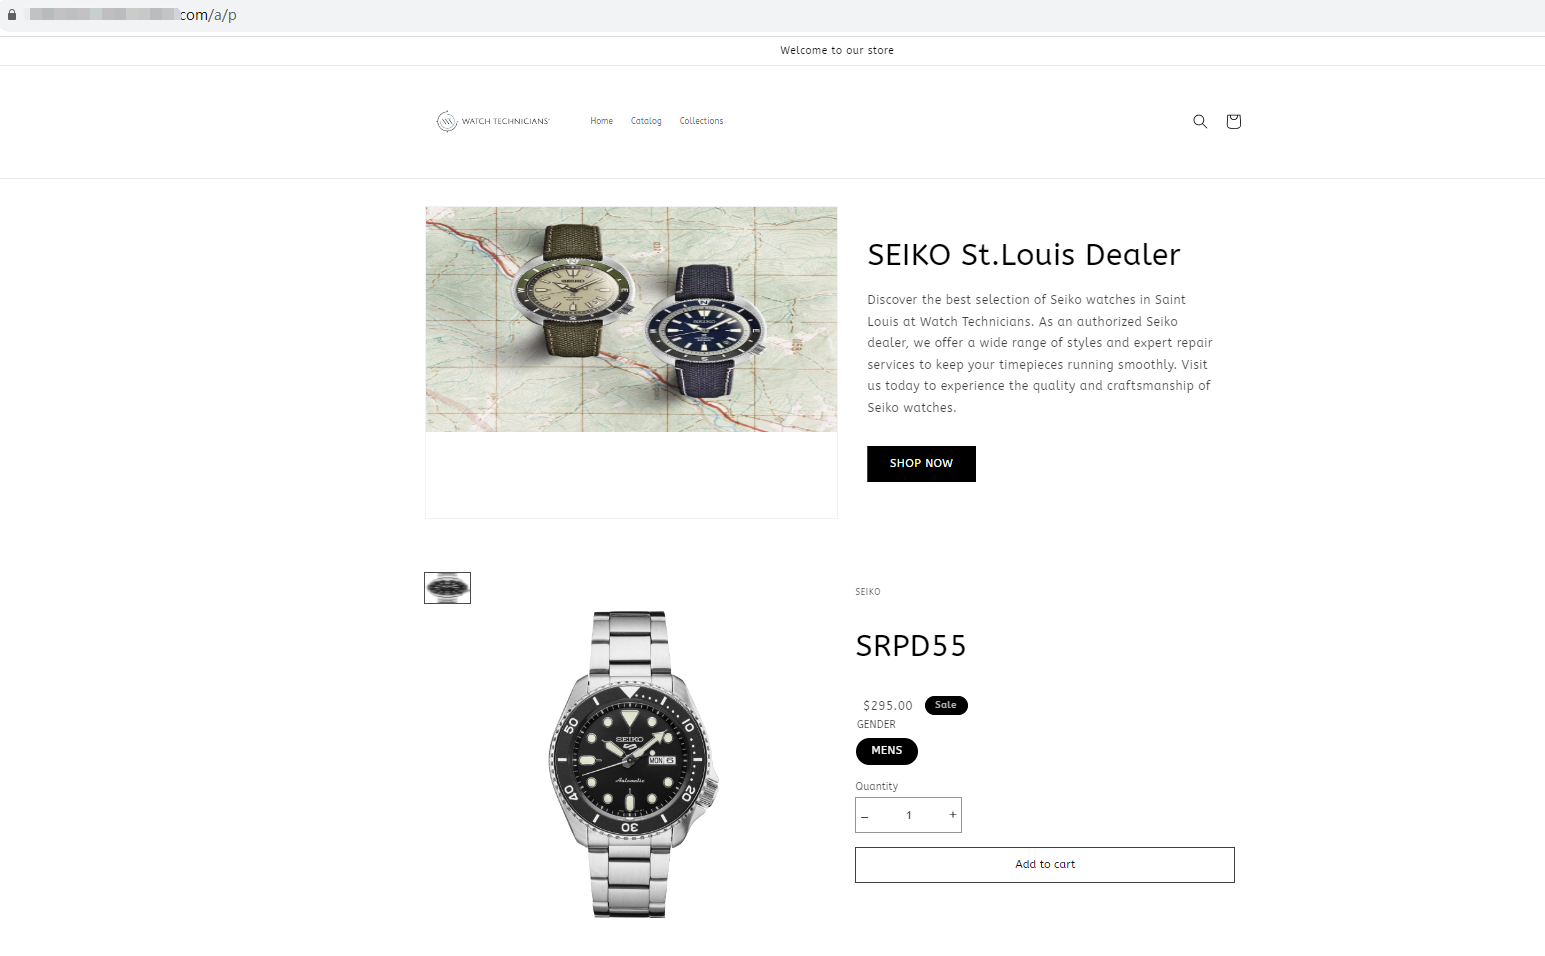
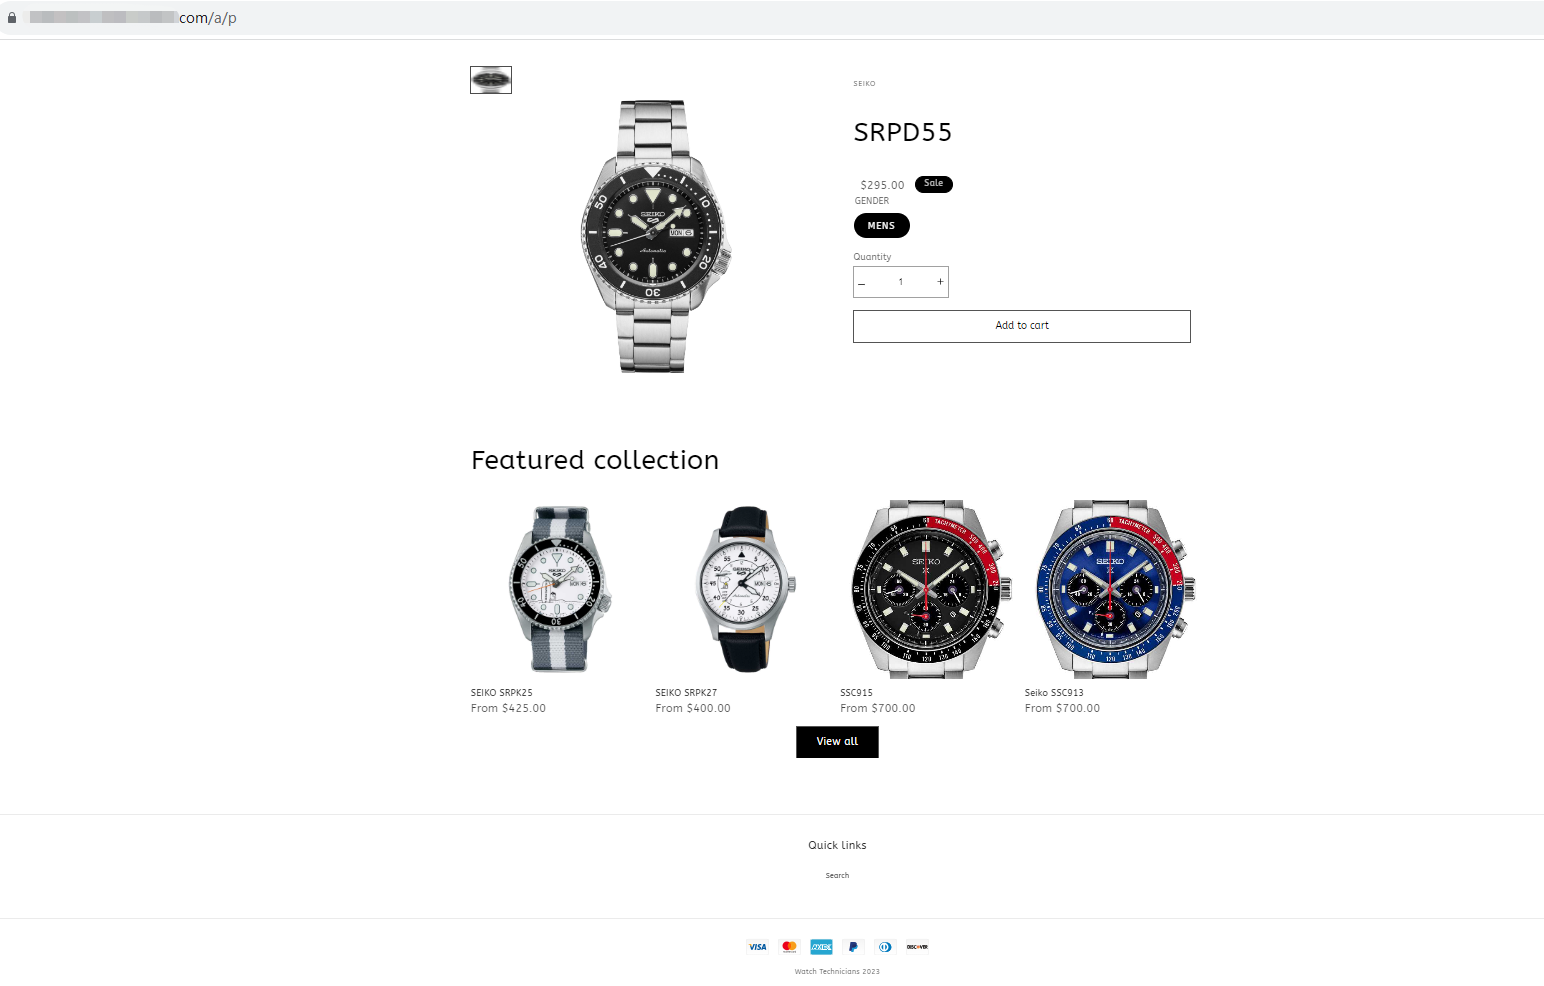
To set up a Homepage AMP page effect like this, you'll need to continue to continue to set it up within the app.
The content added to the Homepage AMP sample effect mentioned above is the following below.
On the left is the added content, and on the right is the corresponding preview effect after the addition.
In the example header sections add the following:
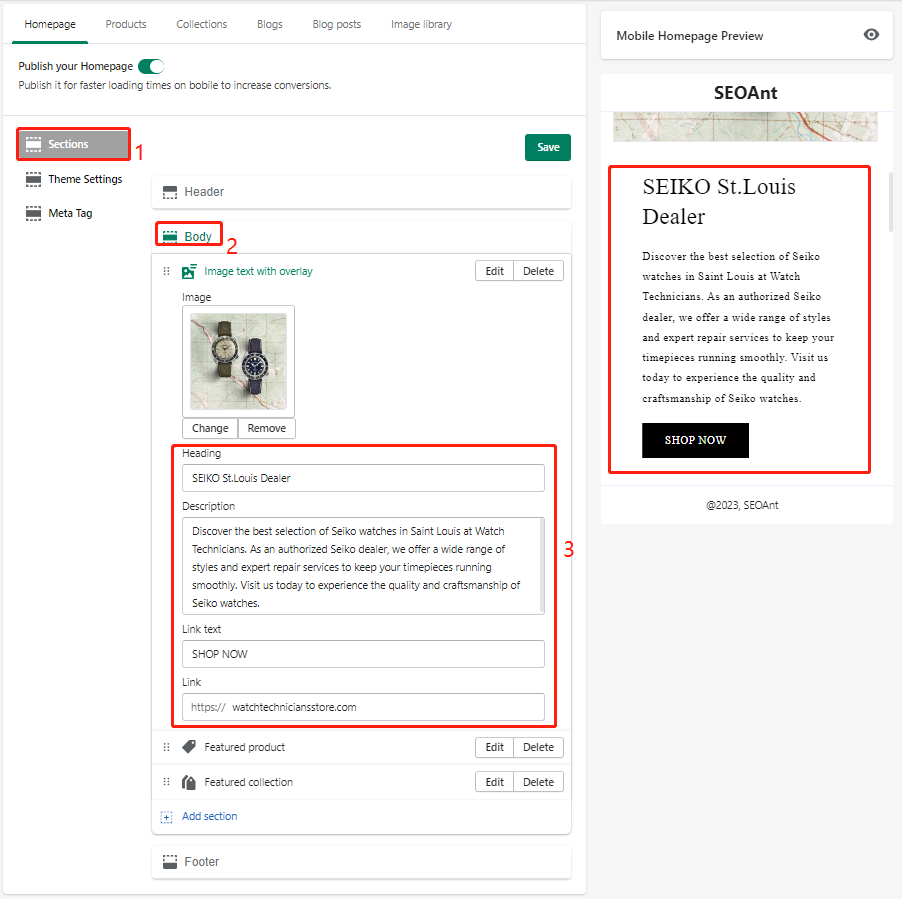
Enter Sections, click Add menu item to add content, there will be a preview of the content added next to the effect, to view easily.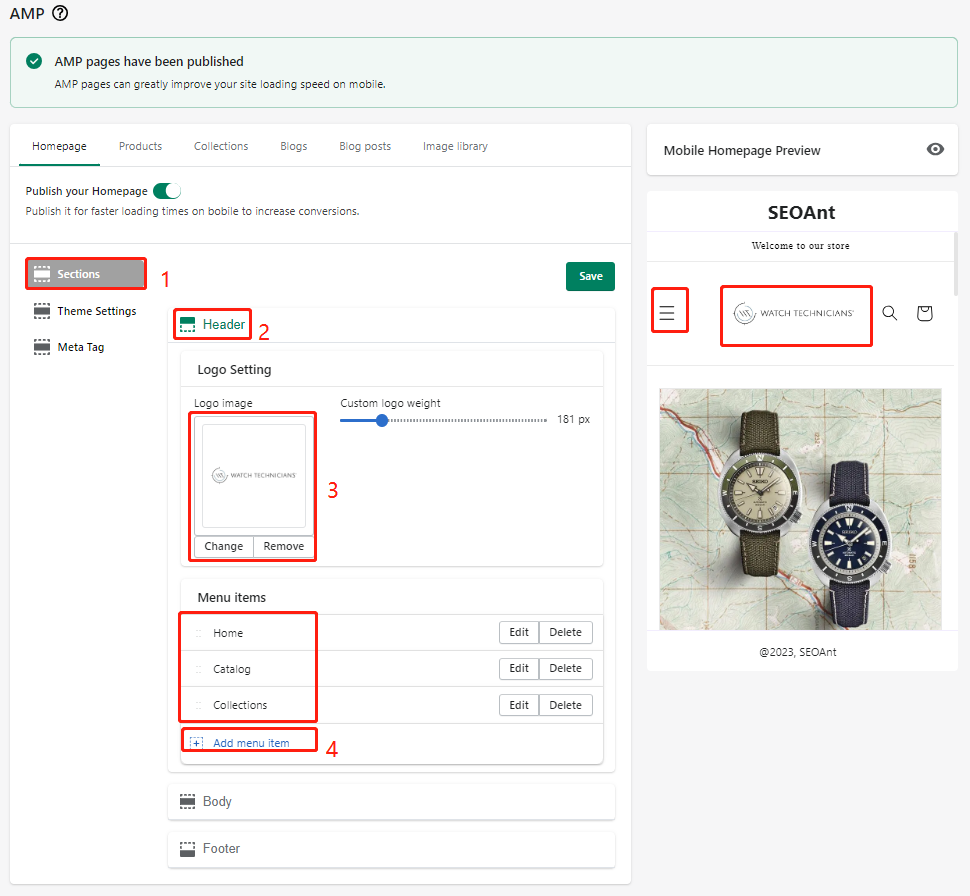
In this example, body sections are added as follows, and 3 sections are added. Tip: Click "Add section", you can selectively add them.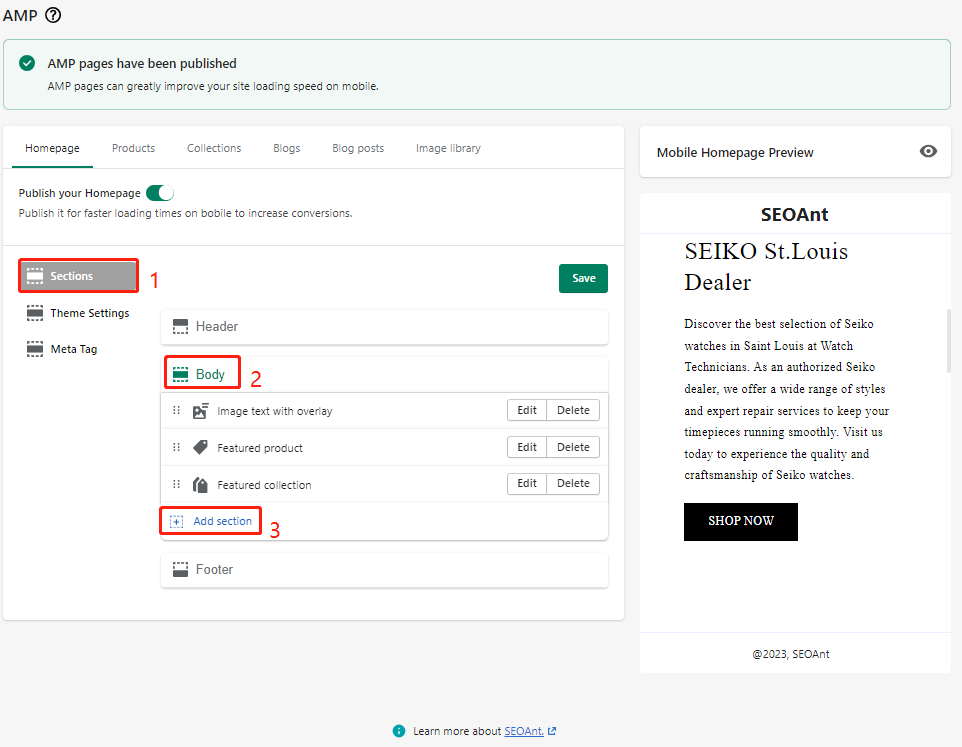
For example, a preview of the content added to one of the body sections, "Image text with overlay", is shown below: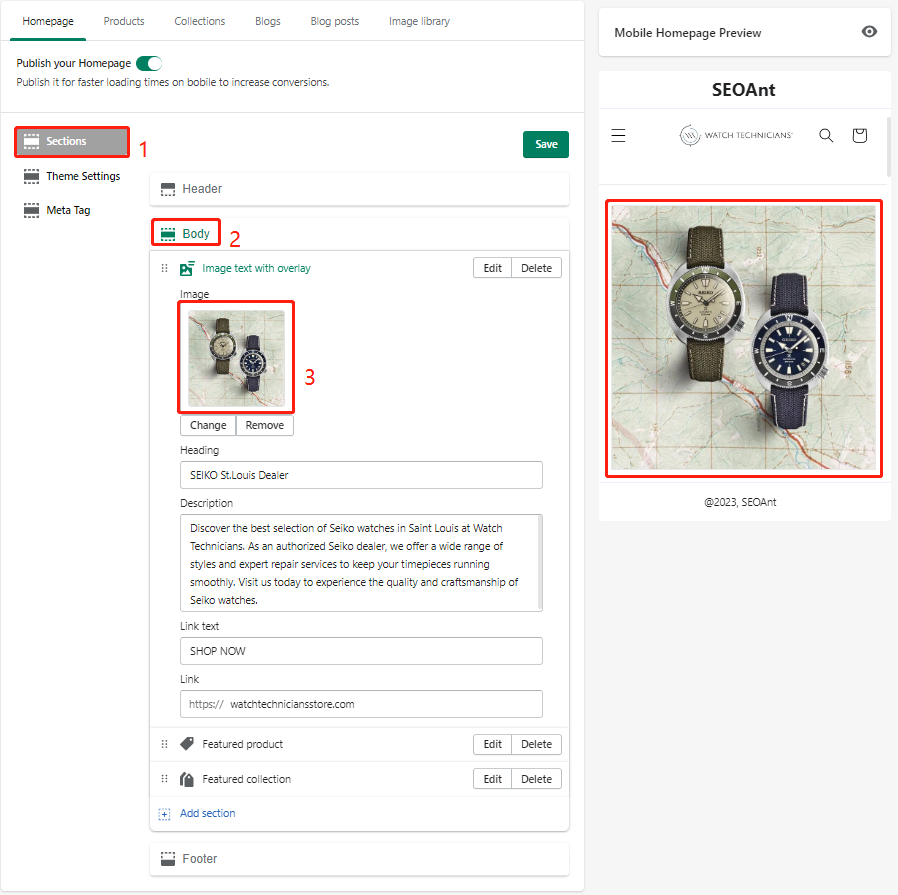
The example of Footer sections are added as follows:
In the example, the "Theme Settings" setting is the default style. If you want to customize the settings, you can click to expand them.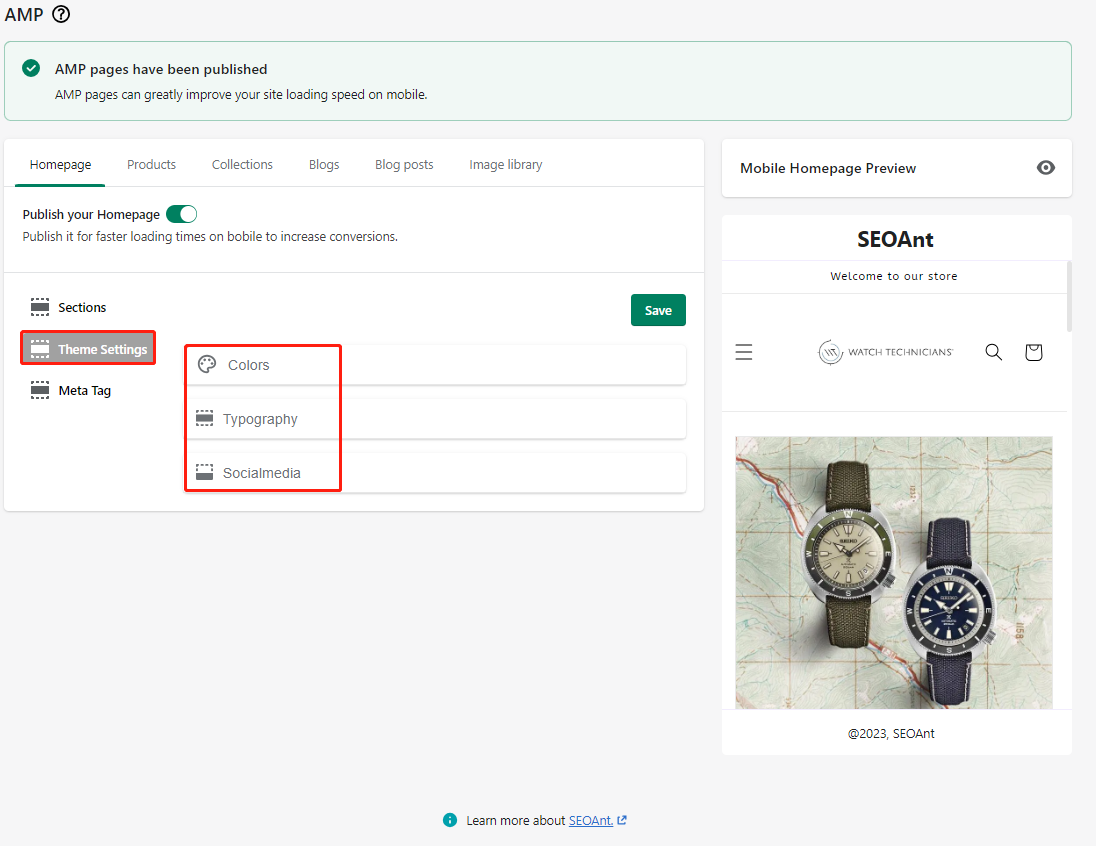
Finally, do not forget to set up the Homepage Meta Tag, because the page is displayed in the Google Search Results, the meta title and meta description of the display are the most direct ones, the viewer will generally read your meta title and meta description to determine whether it is the page he wants to look for. After setup, Google will be more understanding of your Homepage.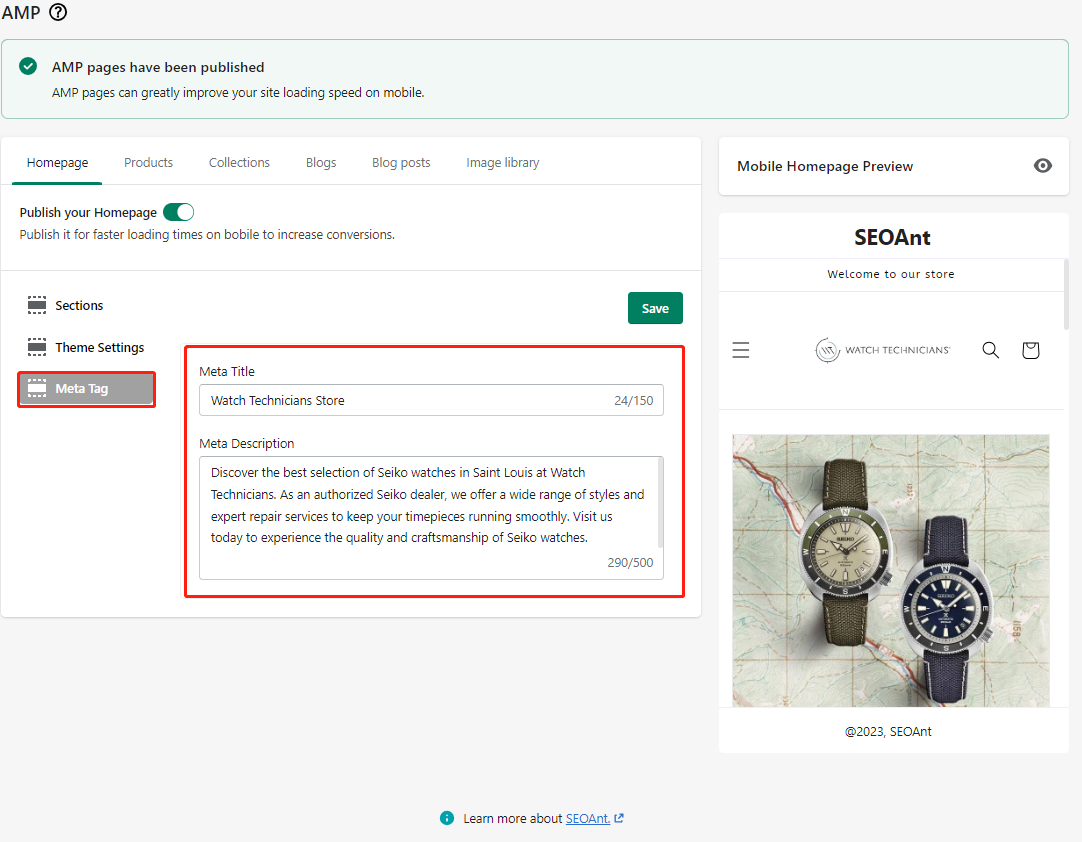
Above is the procedure for the sample Homepage AMP setup.
How to use Image library in AMP
Selecting the "Sync image files" method means synchronizing the images in Files in your shopify settings.
After clicking "Sync image files", the synchronized images are those in shopify Files.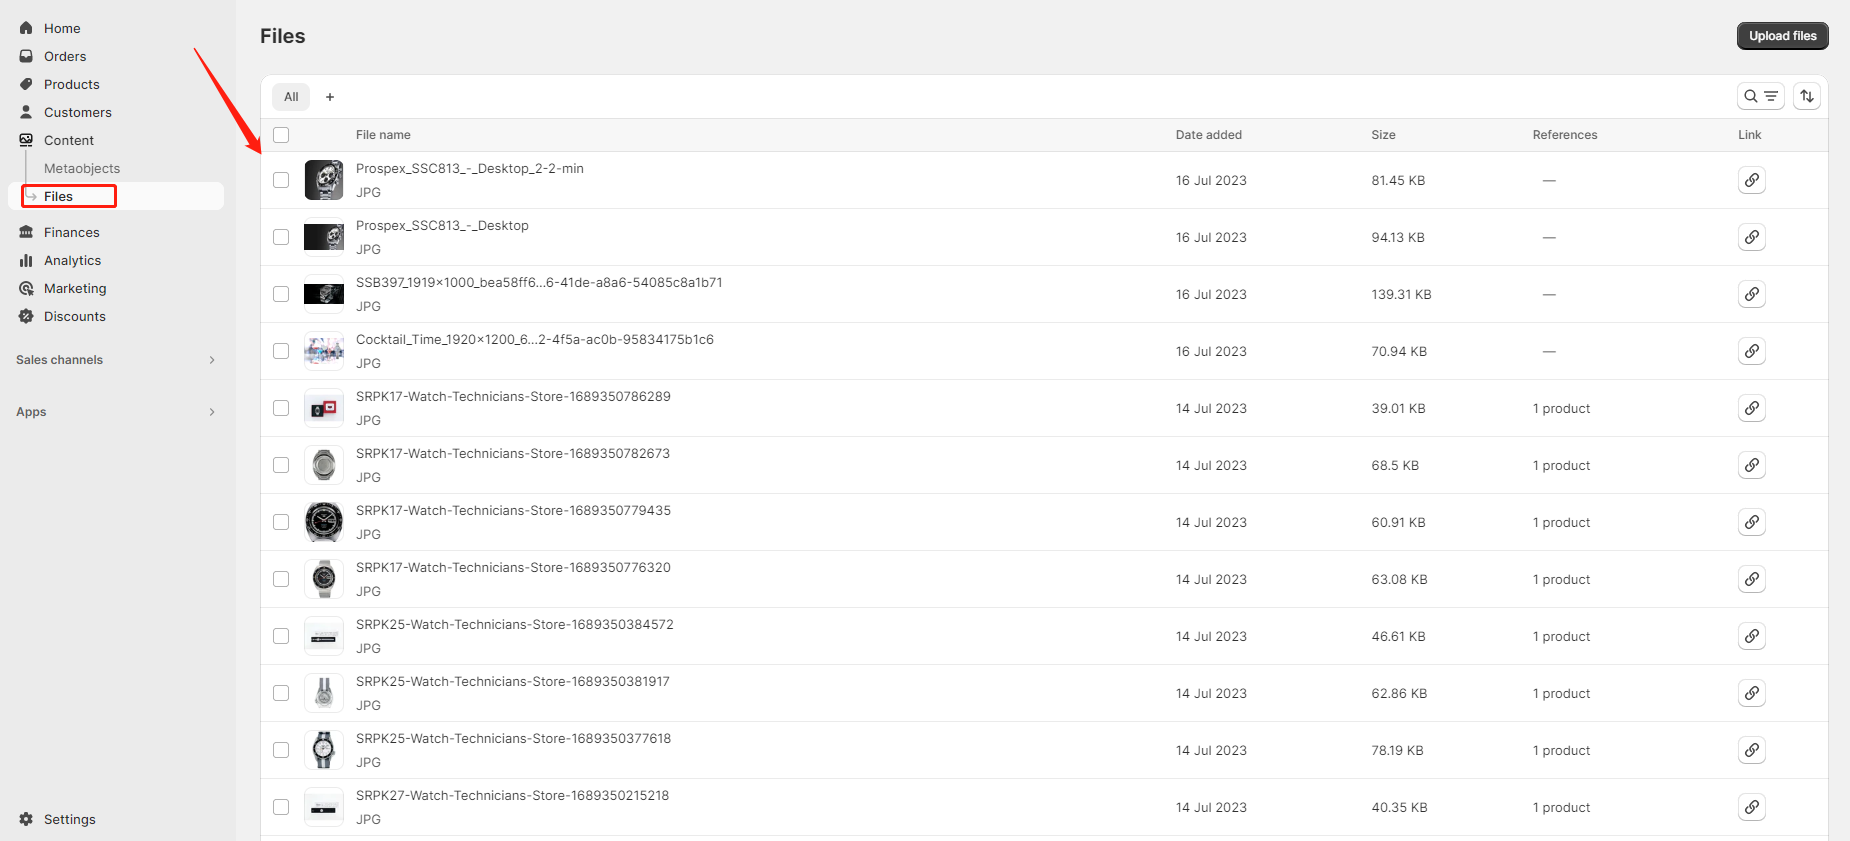
Clicking on "Upload Image" means uploading an image from your local device.
Validating AMP Pages in SEOAnt
Navigating to AMP and clicking on the "Validate this page" hyperlink will redirect you to the AMP page test.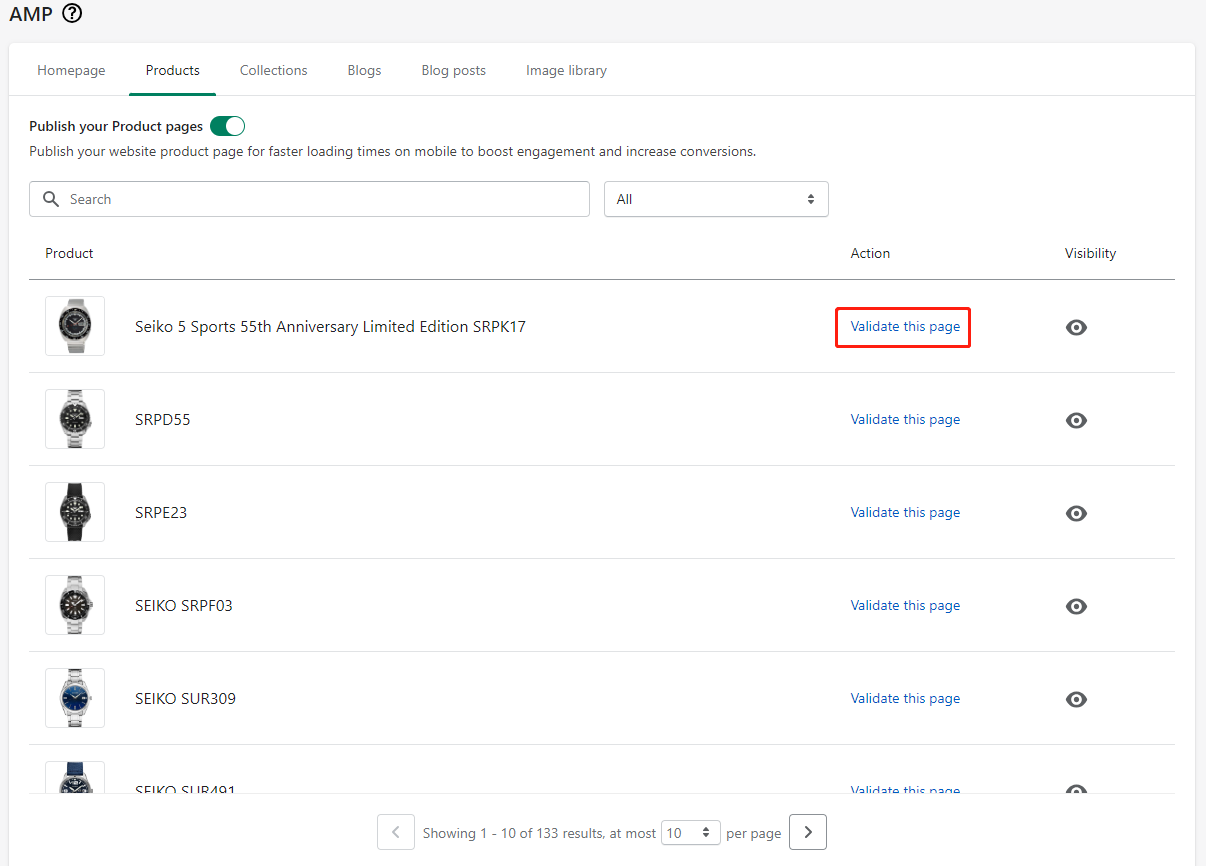
The test result shows "AMP page is valid", which means it is a valid AMP page.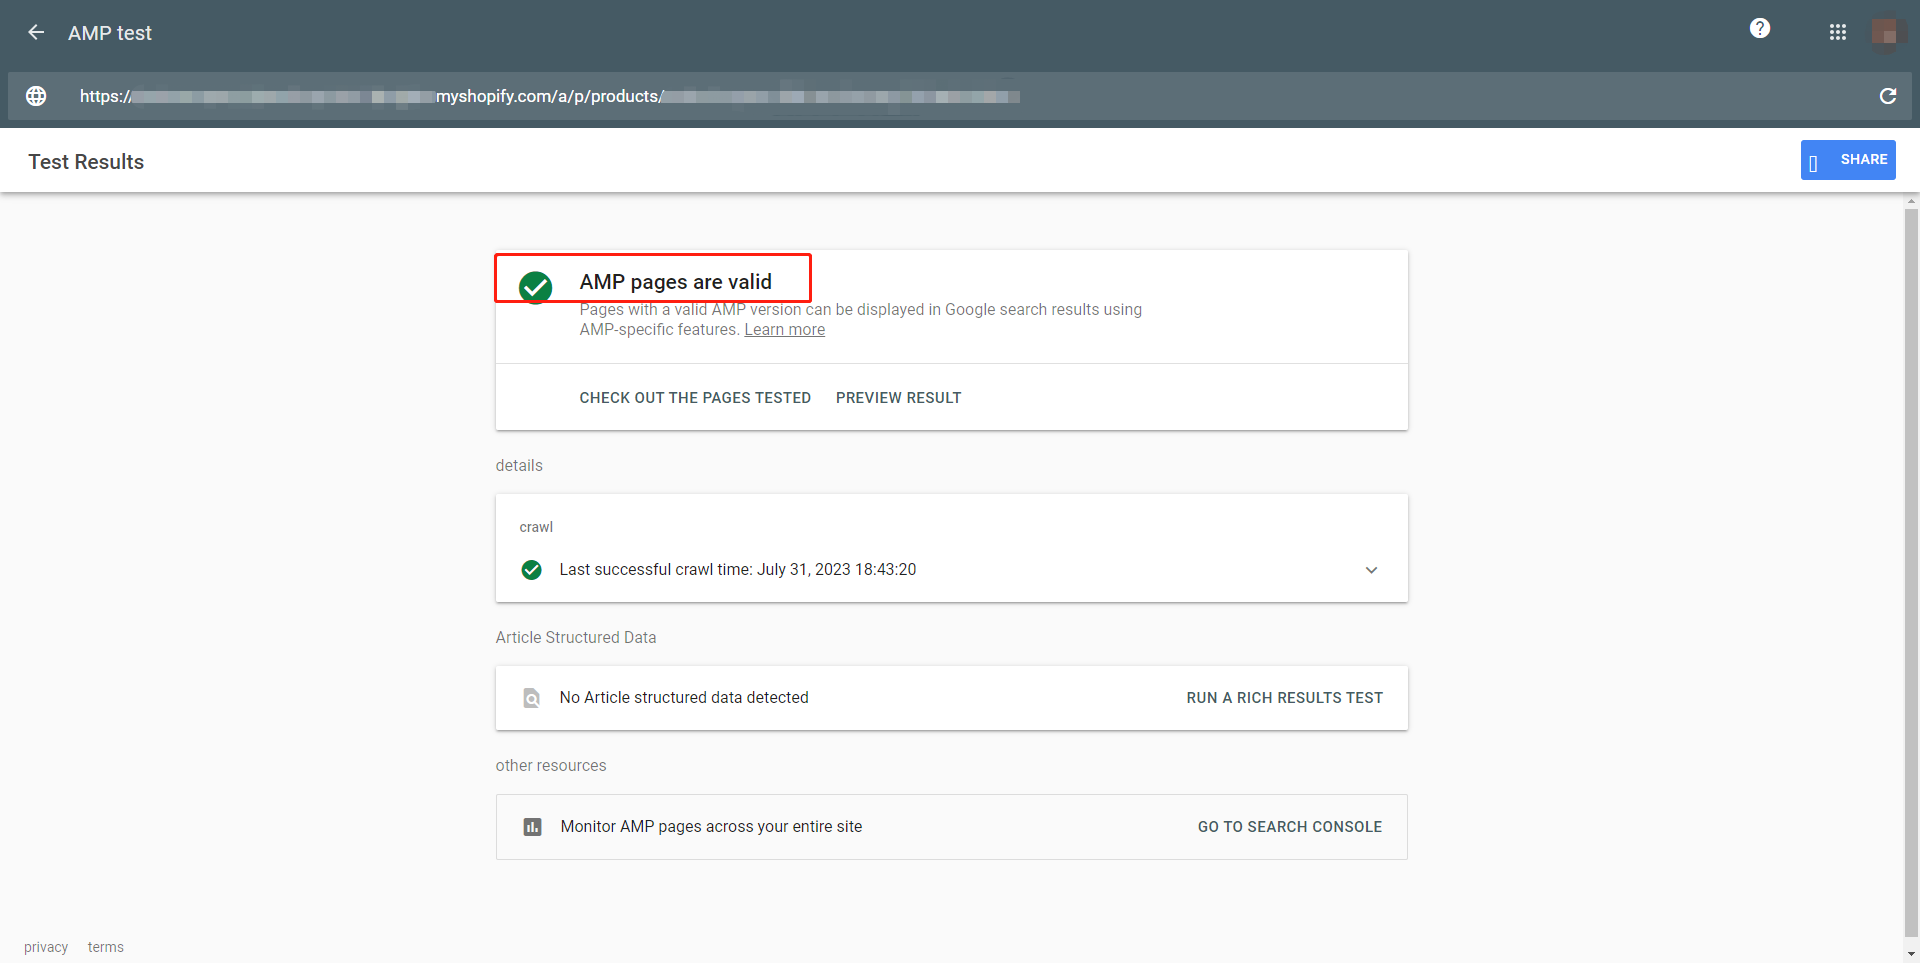
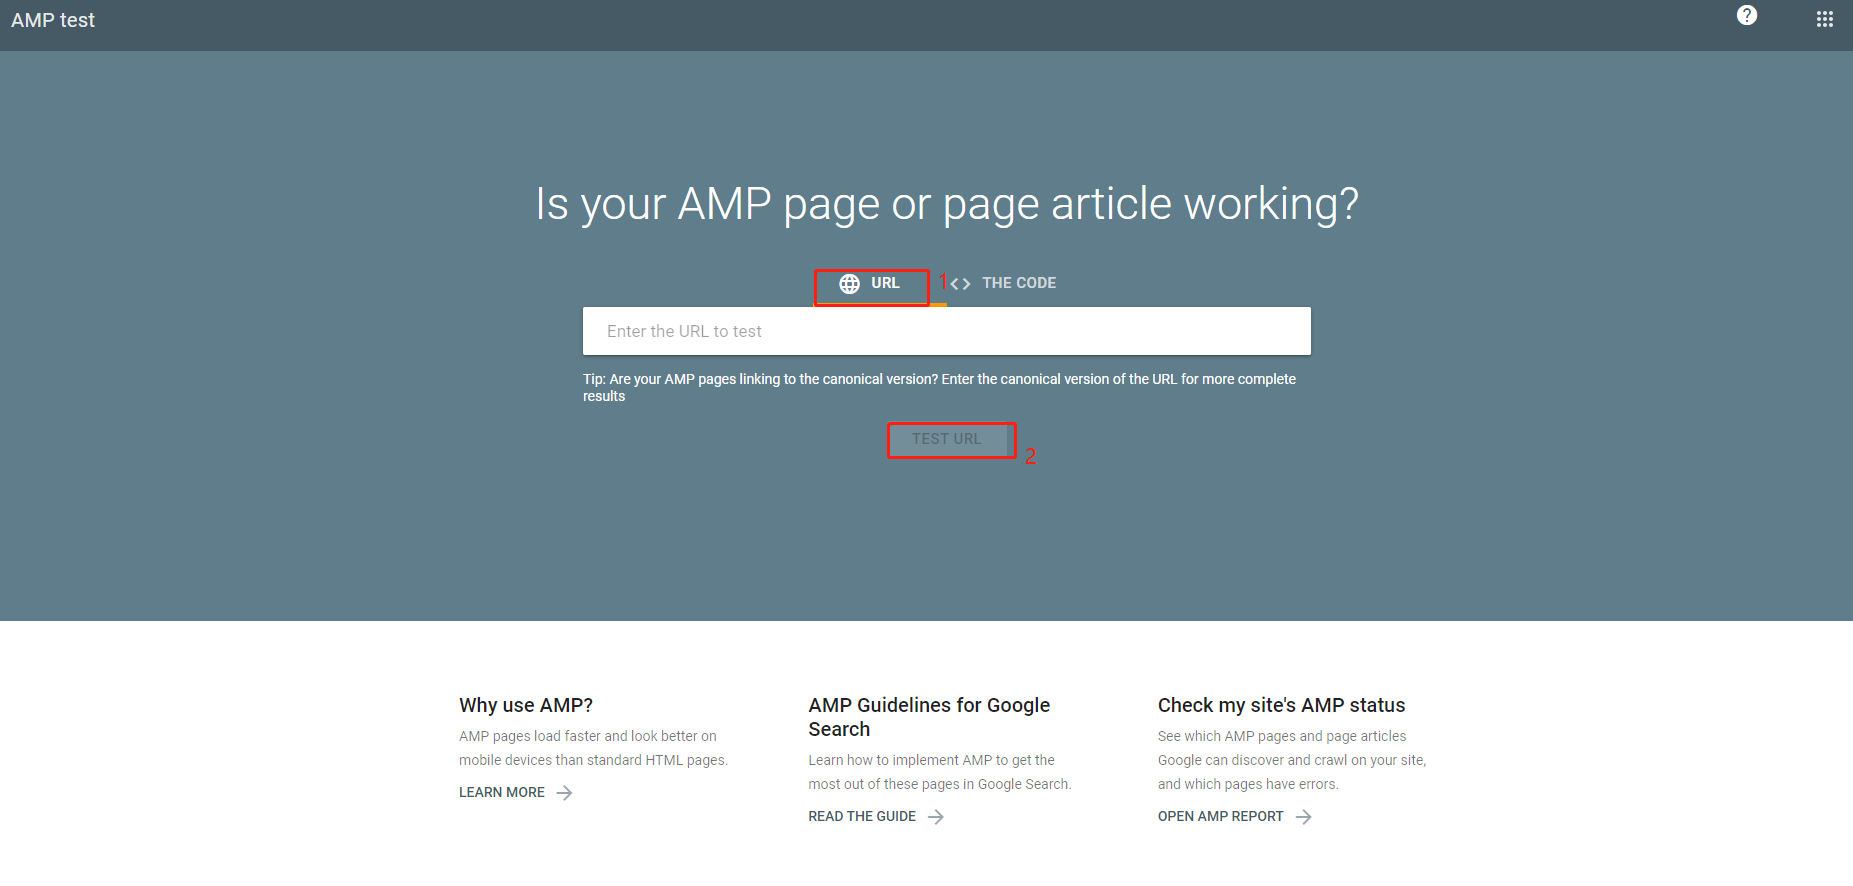
If you want to test a separate AMP page yourself, you can visit the Google AMP test url:
https://search.google.com/test/amp
Enter the url, click the "test url" button, wait a while, you can see the verification results.